Sunday, April 27, 2014

My tasty tasty tasty Mille Feuille


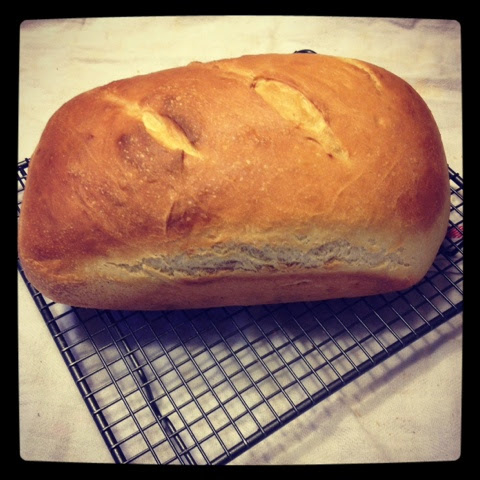
Sometimes in life you just need to pull out all the stops and create a show stopper that will impress even the biggest of critics. Only in the past year have I braved the world of puff pastry and you know what Il be hard pushed to buy the shop bought pastry again after realizing how easy and rediculously tasty homemade puff pastry is.

I was able to make mine while waiting to collect Lottie from school, I had a three hour gap so I got stuck in and while the pastry rested in the fridge I was able to get on with whatever else needed to be done like the horrible job of doing the dishes or tidying the sitting room for the hundredth time that day. Puff pastry is actually perfect to make when you have two tornados for kids , who would have thought ha.

For this tasty treat you will need:

Ingredients:
Puff pastry
450g of Plain flour
350 ml of cold water
Pinch of salt
450g of real Irish butter

Creme patisserie:
30g of flour
2 organic eggs
60g of sugar
300ml of organic milk
1 vanilla pod
 
300ml of whipped Cream

Fruit:
Keelings Irish raspberries

Firstly prepare your puff pastry, you will do this by adding your flour, salt and water to a bowl and mixing well. 

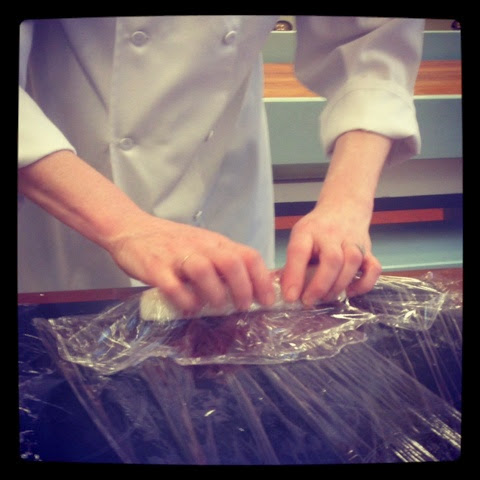
Empty the bowl out onto your table and knead the detempre for a moment. Wrap in cling film and pop in the fridge for 30 minutes.

Once the detempre is chilled enough roll it out into a square shape. Next take your butter and shape it with a rolling pin to a similar shape but smaller and slightly thinner. 

Place it on top of the detempre then fold over the  edges of the dough around it so the butter is enclosed in it like an envelope. 

Flour your surface well and then proceed to roll out the detempre and butter into a long rectangular shape.

Fold the pastry in three making sure the edges are uniform then turn it 90' and roll out again. Seal the edges wrap in cling film and chill for 30 minutes. Repeat this method twice then chill for a further 30 minutes before using

Next preheat your oven to 190". Roll out the pastry as thin as possible and depending whether you want one large mille feuille or small individual ones cut the pastry to your desired size.

 I wanted to make small ones so I cut out small uniform pieces popped them on the dampened baking tray making sure not to distort the shape. 

Then I sprinkled icing sugar over the pastry. Next place another baking tray on top of the pastry to control an even rise to the pastry and put them in the oven for no more than 15 minutes keeping an eye on them all along.

While the pastry is baking you can now make your creme patisserie. 

Start by combining the eggs sugar flour and a small amount of the milk. 

As that's mixing heat the rest of the milk and the vanilla in a pot and bring it to the verge of boiling, take it off the heat and pour it into the egg mixture. 

Rinse your pot out, dry it then return the milk and egg mixture to the pot reduce heat to a gentle simmer and continuously whisk  until the pastry cream has thickened. Pour into a jug and place in the fridge to cool.

Once your pastry is a golden colour and has puffed up nicely place them gently on a wire wrack and let cool completely.

Now it is time to assemble your mille feuille. 

For the first layer I like to pipe blobs of the creme patisserie onto the pastry leaving small gaps for the raspberries to sit in between them. 

Next sit the second layer on top and pipe on small blobs of the whipped cream leaving the same space for more raspberries. 

Finally pop the last layer on dust with icing sugar et voila bonne a petite 


Friday, April 25, 2014

My totally tropical smoothie

A super quick smoothie but one that is different from my previous smoothies is this totally tropical smoothie. It has a gorgeous creamy taste to it so it won't last long

For this recipe you will need:

1 cup of pineapple
1 cup of freshly squeezed orange juice
3/4 cup of Glenisk organic yogurts 

Usually I would put the pineapple in my juicer and then add it to my blender with the rest of my fruit but I decided this time to pop it all in together and then pour it through a sieve. The end result is a smooth creamy smoothie

Enjoy
Rebecca x

Tuesday, April 15, 2014

Aldi's new strong white flour and fast acting yeast

When it comes to spending your hard earned money we all want the same thing, value and quality.

For the past few weeks I have been trying out some baking products from Aldi in my day to day baking and blogging. Top of the list for me was the pantrys strong white flour and fast acting yeast.

This is new to their baking range and I feel will be a big hit for Aldi as it is not possible to buy a shops own brand strong flour. So as a consiquence strong flour can be expensive, which in turn could put people off experimenting with bread making.

I really liked the 1.5 kilo size bag ,for making bread at home this for me is perfect. It will fit in my press with ease as it's not as big as my plain flour or my whole wheat flour as they are 2kilo bags but yet it's still a decent size bag and if weighed wisely you will get 3 loaves from it. 

The flour it self had that silky almost creamy texture that other popular brands have that I and many others have used over the years.

The fast acting yeast was identical to two other brands I had in my press and when asked to spot the aldi brand yeast no one could desipher from the three.

On the side of the flour bag was a recipe idea for strong white flour. It's a perfect starter recipe to get your feet wet in the world of bread making. The big thing with bread making is precision and patience if you can remember that this recipe is a sinch.

For this recipe you will need:
500g of Aldi strong white flour
7g of salt
30g of olive oil
7g of Aldi dried yeast 
310g of warm water 

In a bowl mix the flour salt and yeast together. Add the olive oil and warm water then mix all together with your hand. I decided to use my kitchen aid with the dough hook attached. It says in the recipe to knead by hand on a floured surface for five minutes usually you would allow less time in the mixer but I felt it needed the five, when I tried this recipe by hand while the mixer was hard at it I actually needed to knead it for approximately eight minutes.

Shape your dough into a ball by tucking the dough under itself as you slightly turn it then pop it in a large bowl and cover with a tea towel.

After an hour knock the dough back and shape it into a smooth  oblong shape and place into a lightly oiled 2lb loaf tin. Cover again with a tea towel and let it double in size {approx 1hour}

Slash the top of the loaf with a sharp knife and pop in the oven at 220c for 30 minutes if not golden brown leave for a few extra minutes. I took the loaf out of the tin and popped it back in the oven for a few extra minutes.

I found the flour and yeast to be extremely easy to work with and of high quality. The bread turned out fantastic very flavourfull and disappeared within hours. I look forward to seeing these products on Aldis shelves.

A peanut butter + jelly super smoothie

So here we are another week another super yummy smoothie. And I know I say it every week but I think this could be my favourite one yet.

I'm a big fan of the whole peanut butter and jelly combo I have it on my toast and lately Iv been having it on rice cakes with bananas, it's so god dam good. So like most of my recipes this smoothie came to me this morning when I was having my pb+j rice cake for brekky. Hmmmm Rebecca why not stick this combo in a smoothie {minus the rice cake} and I'm proud to say it is delish

For this recipe you will need:
1cup of Glenisk greek yogurt
1 cup of fresh strawberries
1 cup of raspberries (I used a mix of fresh + frozen)
1 spoon of peanut butter
1 cup of almond milk

Simply add all your ingredients into your smoothie blender and whizz until completely smooth.

Don't be afraid of the peanut butter it adds a gorgeous creamy and slightly salty dimension to a simple fruit smoothie.

Enjoy
Rebecca x

Tuesday, April 8, 2014

Smooth like velvet super smoothie

On my crusade to pack as much goodness into myself and girlies as possible I am finding smoothies really are the answer. And the beauty about smoothies is you can really mix it up between fresh and frozen.

For this recipe you will need:

1 cup of glenisk Greek style yogurt
1 cup if frozen raspberries
1 cup of fresh strawberries
1 banana 
1/2 cup of orange juice{not from concentrate}
1/2 cup of ice

Simply add all your ingredients into your smoothie blender and whizz the life out of them until the mixture has a smooth consistency... Et voile 

Enjoy
Rebecca x

Sunday, April 6, 2014

The kitchen in the castle

To my dismay I arrived at the Kitchen in the Castle an hour late, the joys of Saturday morning roadworks!!! I rushed in all flustered fully aware that a slap on the wrist could be on the cards, but to my relief I was met by an über cool lady kitted out in her culinary finery. I was quickly introduced to  my fellow foodies and we got stuck in. 

The course was called Feast from the sea 2 which for me is a dream culinary course as I just love seafood, ever since I was a wee one on holidays in Galway and I'd be sampling(mandatory) fresh muscles and scallops from my dad's plate. From then on I was hooked.

Our tutor for the day was Hazel Mc Fadden a Ballymaloe trained chef, I could tell early on that this was going to be a bit of craic as she had a wicked sense of humour. For me that's what a cookery course should be all about, a laid back easy listening but highly informative class that's hands on. And that really is the  what they want to instil in everyone that comes to the kitchen in the castle, we are here to support and guide you with new skills and techniques but above all have fun doing it...

As I was late I missed out on the trip to the market to pick out the fresh fish but I was right on time for the prep of the first dish and that was grilled macrel. Hazel showed us  the tricks to taking the heads off the fish with ease the correct way to slash a fish for maximum effect with your marinade.

We were shown how to infuse an oil which then can be used as a marinade in this case we used juniper and lemon a perfect combination with the mackerel.

As the mackerel was marinading my fear of cooking scallops was laid to rest, once prepped properly it literally took a minute on the pan before turning them .Hazel had a super way of showing us how to keep our pans organised, she put the scallops around the pan clockwise which meant they then were turned and cooked all equally...the scallops we paired with a ginger and sesame salad.

Our next dish was Seabream baked in a salt crust this was really exciting to make as I had seen it before on TV with Rick Stein but never thought it could be that do-able. We stuffed the fish with herby goodness like parsley, thyme and bay leaves. Before the Seabream went into the oven we combined egg white and course sea salt together and completely encased the fish In it I don't have to tell you how moist the Seabream was when it was time to tuck in.


During the course of the day Hazel incorporated different types of Irish seaweed into a lot of the dishes like the seaweed baked trout, japenese seaweed salad and my favourite the Dulse champ.

For this side dish we made an amazing mashed potatoes using cream, white wine, lemon and butter I'm just salivating at the thoughts of it ha. The Dulse is an amazing burgundy coloured seaweed that you can buy dry and then rehydrated in warm water. This was then finely chopped and combined in the mash...amazing is not the word.

The trickiest dish of the day was definitely the monkfish once the dark skin was removed it also il had an outer skin that had to be removed i was happy to just observe for that part . Hazel showed us how to Ballantine the monk fish which is a fantastic way to shape the fish that then can be cut into perfect medallions before serving.

Using the bone from the monkfish we made an amazing tarragon sauce to compliment it and no word of a lie we were having equal parts of monkfish and tarragon sauce, crazy good that's all I can say.

Through out the course we were given little gems of wisdom by our chef like know how to work your senses around the kitchen it could be the difference between Bon appetite and sorry your having beans for dinner I burnt the spuds!!!

I left feeling completely satisfied and at the same time all fired up and ready to take on all those fish dishes at home, the icing on the cake for me would have been if I had the hubby to drive me home so I could have had a nap as I was so full from all the seafood.

The kitchen in the castle has a jam packed calendar with something to suit absolutely everybody. so far I have my dads birthday present sorted with the paella + tapas course in May and then a fab day out with my hubby for the BBQ course, ever since our stint in Canada he's mad for the BBQ.


© Num Num Cupcakes. Powered by