Sunday, December 7, 2014

The magical mini mince pie

Ah the mince pie love it or loath it, but there is no denying that the mince pie is Christmas all wrapped up in a tasty shortcust cup.

If my dad had his way he would have me making mince pies all year round so luckily for his cholesterol I limit it to December. Even though it is the 7 th and Iv made 3 dozen today. 

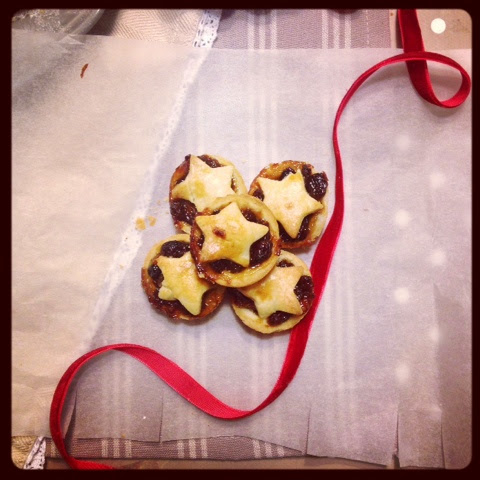
May I add that they are mini mince pies because I just love all things mini when it comes to baking, pastries seems so sweet and delicate when they are miniature.

I have used my tried and trusted short crust pastry in this recipe that shines bright every time so I knew before I even tasted these mini delights that they would be special.

For this recipe you will need:

Pastry:
100g cold Connacht gold butter with added sea salt flakes
175g of plain flour
25g of icing sugar
1 egg yolk
1 1/2 tablespoons of cold water

Filling:
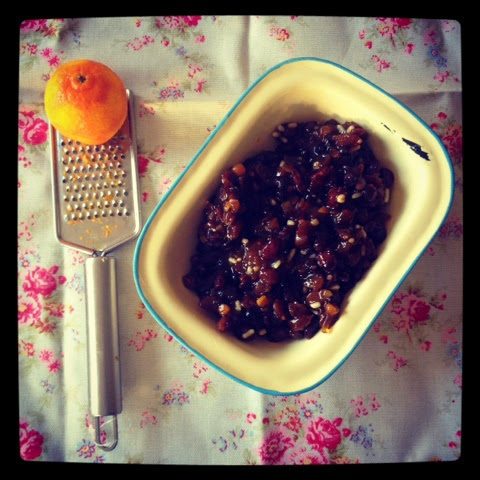
1 jar of quality mince pie filling
The zest + juice of 2 clementines
50g of dried cranberries
50g sultanas 

Tools of the trade
Mini cupcakes trays
55mm round cutter 
Mini star cutter
Mini flower cutter 

Firstly empty your mince pie filling into a bowl and add the additional ingredients then mix well so all the juices and zest infuse with the new and old dried fruit.

Set the filling aside and begin to make your pastry. I like to rub the cold butter into the dry ingredients until the butter has crumbled into teeny tiny pieces. The Connacht gold butter Iv used today has added sea salt flakes which adds another dimension to my shortcrust pastry, salt is an important part in baking especially when real butter is involved.

Next add in the egg yolk and water and combine with your hand until it all comes together into one big ball.

Flour your work surface and your rolling pin and roll out the pastry thin enough that it will hold it's shape without tearing.

With your round cutter cut out  30 discs but before you place them in the tins lightly spray them with cake release. Sit them into the tins but be sure not to squash them into place this might give you bother when you're trying to release them after baking.

With two teaspoons spoon a small amount of the mixture into each case, to much and it will just ooze all over the pastry and literally glue the pies to the tins.

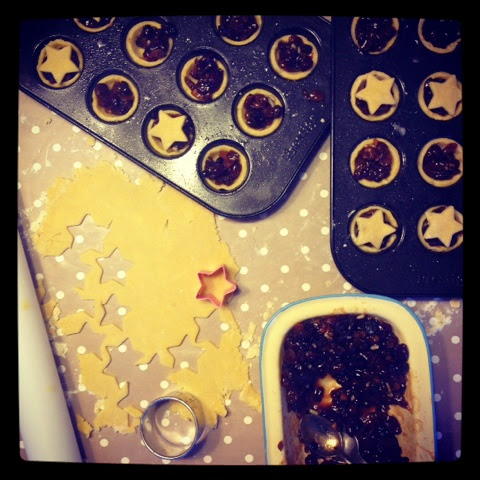
With your remaining pastry cut out your shapes and sit them on top of every pie. 

Lastly paint on the egg white that was left all alone by the egg yolk then pop the tins into the oven @ 160'c for 20 mins.

Personally once they come out of the oven I like to carefully take them out of the tray because if any filling has escaped once it cools it will harden and in turn be a bugger to get out in one piece.

I like to simply dust mine with icing sugar and devour with a nice mug of tea.

Let the festivities begin

Enjoy
Rebecca x

Thursday, November 20, 2014

Coffee lovers Christmas gifts

My guide to buying to buying the perfect gift for that coffee lover in your life..

A few months ago I was invited to a coffee master class hosted by Bewleys. It was a very chilled and informative evening where we got to taste three coffees from their "special collection".

A number of these coffees are not only fair trade but also organic and each are quite different from the next. Which I think is perfect as there is a coffee that will suit everyone's taste.

The first coffee is the Ethiopia, this is a sweet and aromatic coffee with delicate floral notes. What I got from this coffee was a gorgeous dark chocolate taste. I was told that this is a coffee for the adventurous!!!

The Ethiopia is an organic coffee and fair trade. It is gently dried in the sun and then hand roasts by Bewleys in small batches.

The brewing technique of choice for this coffee is the Chemex. It looks like something from my school science lab and very appealing to the eye. You can buy these in different size for cup capacity and retails from €32.00

This brewing system is very simple to use. Begin by boiling 500ml in your kettle.

Place you filter paper In the Chemex and triple fold.

Pre wet the filter paper then pour out the water.

Add 35g of coarsely ground Ethiopia coffee and then pour 50ml of boiling water onto it and let it bloom.

Wait for 30 seconds then pour the remaining water slowly into the filter in a circular motion.

This process should be completed within 3 minutes.

The second coffee we tasted was the Bolivia. It had a lovely rich flavour with more dark chocolate notes and also had a creamy caramel taste. 

The Bolivia is an organic and fair trade coffee. It is grown in high altitudes and hand roasted in small batches by Bewleys. 

The brewing technique of choice for this coffee is called the Aeropress. 

This is a super compact piece of equipment perfect for at home or on the go. It is simple to use and dishwasher safe. It retails for approx €28.99

Start by boiling the kettle then grind coffee to a medium/fine consistsancy.

Wet the filter then place it in the Aeropress.

Turn the Aeropress upside down then add in 18g of the coffee.

Pour in 50ml of boiling water and stir.

Leave to infuse for 30 seconds then stir again.

Add 230ml of boiling water, stir once more then close the lid tightly.

Turn the Aeropress right way up and place over your cup and slowly push down the plunger.

Complete this technique in less than 2 minutes.


Last but not least is the Panama coffee. This coffee has lots of acidity but is very fruity and very clean. 

It has toasted nutty notes to it. I was told that this coffee is perfect as a breakfast coffee.

The brewing technique of choice for this coffee is called the Syphon brewer. 

It is definitely the show stopper of the three and you would be on to a winner if you presented this after your dinner party to your guests. It retails approx €90 to €100.

Again the technique for this brewing system is not complicated even though it looks as if you would need a degree to make the coffee.

Begin by boiling the kettle. 

Measure 18g of the coarsely ground coffee.

Rinse out the filter in warm water then place it on the chamber.

Fill the bottom glass chamber with 230ml of hot water.

Turn on the burner and apply high heat.

As this boils away the water will travel up to the top chamber.

Once 3/4 of the water is in the top chamber start your timer and stir in a slow circular motion 3 times.

After approx 45 seconds turn off your burner and stir in a circulate motion once more.

The coffee will disperse into the bottom chamber it is then ready to enjoy.

All three of these specialty coffees can be bought on Bewleys online shop for as little as €7.99 and they come in a very smart display tin.

The perfect coffee lovers Christmas present indeed.

Enjoy
Rebecca


Almond and cinnamon pancakes

Sometimes in life it's nice to be good to your body seeing as it's the only one you've got!!!. These pancakes will tick all the boxes and are quite festive with the addition of cinnamon.


For this recipe you will need:
130g of ground almonds
1/2 cup almond milk
1 teaspoon of vanilla paste
1/3 teaspoon of cinnamon
2 eggs
Coconut oil 

Mix all your ingredients together in a bowl, let that sit for a moment.

Heat your pan on a medium to height heat and add a teaspoon of coconut oil, then dollop in you pancake batter. You will notice the mixture is much thicker then a four batter but that is exactly what you are looking for.

This mixture is perfect for 2 servings I like to add bananas to my dish with a drizzle of honey on top

Enjoy
Rebecca x

Wednesday, October 8, 2014

Home grown sundried tomatoes

There is a cafe next door to where I work and as the creature of habit that I am I always order the same lunch when I decide to buy out. It's called the Italian, there is pesto mayo a sourdough roll and juicy sundried tomatoes amongst others.

Sundried tomatoes can a success or a complete disaster all chewy and bitter. So this summer when I had a bumper crop of juicy cherry tomatoes in my mini greenhouse I decided to make the most of them and make my own sundried tomatoes.

It can be a slow process but well worth it I promise.

For this recipe you will need:

Cherry tomatoes of any quantity
Salt and pepper to season
Good quality olive oil

Start by pre heating your oven to 90'c.

Wash your tomatoes and slice them all in half, then place them all on large baking tray.

Season the tomatoes with salt and pepper.

Pop the tray into the oven and set your timer for 2 hours and get on with joyous task of cleaning the house.

After 2 hours your tomatoes should look shrivelled but not cremated by roasting them on a low heat it will intensify the flavour while keeping them juicy.

Spoon the warm tomatoes into a sterilised jar and then pour in your olive oil until it covers the tomatoes. 

By doing this while the tomatoes are warm the oil will infuse with the tomatoes to make a gorgeous dressing or drizzle for future sambos YUM.

Enjoy
Rebecca x

Tuesday, October 7, 2014

Plum jam in a hurry

I love when plums are in season and even better when they are ripe and ready for the picking.

I picked up a punnet the other week while doing the weekly shop and I knew exactly what I was going to make JAM. Plum jam has the softest sweetest taste that you would be forgiven if you eat it straight from the jar.

This recipe will make you two jars of plum jam.

For this recipe you will need

500g of ripe plums
500g of caster sugar
2 tablespoons of water
1 lemon

Begin by putting the plums in a medium sized pot then pour in the water {I didn't remove the stones from the plums as I sieved the jam at the end}

Bring to the boil then reduce to a medium heat and let simmer until you see the skin begin to peel off.

With a wooden spoon stir the plums every now and then.

Next add in your sugar and and continue to stir until all the sugar has dissolved.

Cut your lemon in half and squeeze the juice in the pot then pop the remains of the lemon in also.

As your jam is cooking thoroughly wash your jars and pop them in a pre heated oven at 180 for ten minutes.

Let the jam bubble away on a low to medium heat and every 5-10 minutes check the jam on the back of a spoon, if you can run your finger down the center of it and it leaves a line that shows the jam is ready to be jarred.

I pushed the plum jam through a conical colinder so as to catch the stones and piths from the lemons. I then spooned the plump flesh from the plums into the jars leaving the stringy fibers behind.

Enjoy
Rebecca x

Tuesday, September 30, 2014

A speedy gluten free berry crumble

Two weeks ago I found myself in a dilly of a pickle {ha} I was popping into see the girls Nanny Jo and grandad but I had nothing sweet to bring with me. I like to bring in baked goodies from time to time, gotta keep them sweet...

Luckily for me I hord sweet ingredients in my freezer like berries, sometimes if I see a great offer on blueberries or blackberries in the shop il buy them and pop them in the freezer for such an occasion.

For this recipe you will need.

Crumble:
100g Ground almond
100g Ground oats
100g Butter
100g Light brown sugar 


Filling:
1 cup Blueberries 
1 cup Blackberries
1 cup Raspberries
1 grated apple

First pre heat your oven to 220'c. Next in a large bowl add your ground almond and oats, sugar then lastly your cold butter. 

With your fingers rub the butter into the dry ingredients, this will take a few minutes.

Once your crumble topping is ready put all your berries and grated apple into your oven proof dish I used an enamel dish but something like a pirex dish is perfect.

The crumble topping will have the consistsancy of a paste so dollop on the crumble with with your fingers or a spoon. 

I topped mine off with some flaked almonds and hazelnuts.

Bake your  berry crumble for 20 minutes at this point the topping should be a golden colour and the juice from the berries should be bubbling through it..

We gobbled this down with a generous dollop of custard...deelish 

Enjoy
Rebecca x

Tuesday, September 2, 2014

Lemony protein pancakes

I received a giant tub of lemon cheesecake protein powder a couple of weeks back and I knew straight away what I was going to make with it PANCAKES...

The thoughts of drinking it like a shake made my tummy flip so I decided to go down the route I know so well, baking and the likes. Even though I bake for a living I am very aware of what I eat so everything in moderation is the cheesy cliche I live by. Dance like nobody is looking is another but we'll leave my dancing skills for another day.

This is a super quick and convenient recipe and the quantities that I have worked out make the perfect portion for one..

For this recipe you will need:
1/3 cup of ground porridge oats
1/2 cup of protein powder {mine is lemon cheesecake flavour}
1 egg
Almond milk unsweetened
Raw coconut oil
Extra virgin olive oil

Firstly in a food processor blitz 1/3 cup of porridge oats for a few seconds until it turns into a flour like consistsancy.

Next add the porridge oats and 1/2 cup of protein powder in a bowl.

Add in the egg and 2/3 cup of almond milk and whisk together until the batter is lump free. You don't want your batter to be a thick consistsancy as the pancakes will end up quite dense which let's be honest would be gross.

If you feel you need to add another splash of almond milk please do as each brand can differ to the next ...
In a pan add 1 teaspoon of coconut oil and a small splash of olive oil, give it a swirl. I used my grannies big silver spoon do pour in the pancake batter as it gave the perfect pancake size. You definitely want something bigger than a dessert spoon but definitely smaller than a ladle.

This mixture makes 5 perfect pancakes...
A mid week treat but without going off the rails ha..

Enjoy
Rebecca x


Sunday, August 10, 2014

My GIY guest blog #3


Over the past few months I have been lucky enough to guest blog on a fab gardening blog called www.beyondthewildgarden.com. Below is my third installment for my grow your own antics...

http://beyondthewildgarden.wordpress.com/2014/07/18/num-num-not-only-bakes-she-gardens-a-bountyful-table/


Friday, July 25, 2014

Home made lemonade

What a summer we are having it is one of the hottest days of the year and I'm lucky enough to be sitting out in the sun writing this blog.

I received a fabulous recipe the other day from Cloughjordan House cookery school and the timing couldn't have been better. 

It was their recipe for home made lemonade, and as my house always seems to have an endless supply of lemons in it for baking I was able to try it out straight away.

For this recipe you will need:
250g of sugar
250ml of water
3 lemons
3 limes
2.5 litres of water

To begin add your sugar and 250mls of water to a pot and heat. Peel the zest of one of the lemon and lime without the pith with a sharp knife and pop that in the pot with the sugar syrup. Bring this to the boil and stir until sugar has dissolved.

Once that is ready take it off the heat and get on with juicing your lemons and limes. Next add this to the sugar syrup then strain it all into a large carafe, lastly add in the icecold 1.5 litres of water with some ice and maybe a few slices of lemon and bobs your uncle you have yourself an amazing summer drink.

Mine lasted not even a days was practically hiding the carafe by the end from my family...{as I did not have any limes in the house while making this recipe I used 4 large lemons instead}

Saturday, July 12, 2014

Luscious lemon bars

When the weather is so good like it has been we are out in droves for picnics, to the beach, even out to the garden to lap it up before it's gone. And with every good packed picnic comes a sweet treat that won't melt in the heat ( I am been extremely optimistic with the "heat" part)

These luscious lemon bars are the perfect a compliment to every picnic..

For this recipe you will need:

Base:
150g of real butter
1 1/2 cups of plain flour
1/3 cup of sugar

Filling:
4 eggs
2 cups of sugar
1 1/2 tablespoons of lemon lest
3/4 cup of lemon juice
1/2 cup of flour 

Cream the butter together and sugar until pale then mix in the flour. Once combined spread out your mixture evenly over your baking tray which has been lined with baking paper, I used a Genware 31cmx21cm aluminium baking tray I'm a big fan of shopping online as it can be tricky sometimes shopping with two little "active" toddlers. Viking direct have a large selection of this range. 

Pop the baking tray in the oven for 15 minutes @160". While that is baking away get stuck in to making the zingy filling for the bars.

Start by whisking the eggs until pale and smooth, next sprinkle in the sugar and continue to whisk until the sugar has cometely dissolved (if you have a little feel of the mixture and there is no grainy feel to it that's a green light to move on to the next stage)

Pour in your juice and zest into the mix and continue to mix, lastly add in your flour once fully combined stop mixing and set aside.

Once your biscuity base has baked take it out of the oven and spoon in the lemony batter then gently spread all over the base and return to the oven for a further 30 minutes.

When your traybake comes out of the oven it should be even in colour and the filling should have a springy feel to it. With this baking tray I found it very reliable for even heat distribution which may sound a tad scientific but an even bake is all down to your equipment (lecture over ha)

To add the finishing touches I liberally dusted the lemon bars with icing sugar then cut them Into bars.....delicious 

Enjoy
Rebecca x
 

Monday, June 30, 2014

Elderflower cordial

So I took the plunge and made Elderflower cordial this week and I'm so pleased I did it tastes so so good and I shall be baking with my yummy cordial this week...keep you posted on that.

The recipe for my elderflower cordial is on my other blog I share with my Besty Laura here is a link below for the cordial try it out and let me know how you get on 


Enjoy 
Rebecca x

Melon and pineapple smoothie

Another surprisingly yummy smoothie to tickle your taste buds is this melon and pineapple smoothie, they are in full swing in the shops at the moment. 

It's hard not to get lured in by them as you walk past them in the isle their aroma is captivating..

For this recipe you will need:
1 cup of pineapple
1 cup of melon
2 heaped tablespoons of glenisk yogurt

Once you have removed the hard outer layer of both fruit pop them in your bender along with the yogurt and whizz them up until smooth. 

Iv only used a small amount of yogurt in this smoothie as the fruit is extremely juicy and the consistsancy would end up to watery.

This smoothie is a real thirst quencher not as sweet in taste as most smoothies very summery indeed. 

Enjoy
Rebecca x

Saturday, June 21, 2014

Black + blue super smoothie

I just realised that the guts of a whole drawer in my freezer has been comendeered  by fruit that I have purposely frozen for smoothies. 

It's actually a super idea to do rather than buying frozen fruit that potentially has freezer burn, buy juicy fresh Irish berries and freeze with the intention of whizzing up in smoothies in the not to distant future :)

So we are all coming to the realisation that the more colourful the food the more benificial it is for our health and well being. And on that list of rainbow foods are the rich blue blueberries and the deep purple blackberries, they are full of vitamins and antioxidants but when combined make the most fantastic speckled plum colour tones.

For this recipe you will need:
1 cup of blackberries
1 cup of blueberries
1 cup of Glenisk natural yogurt with mango


Simply add the three ingredients to your blender, I have used Glenisk's mango yogurt this time as I found the sweetness of the mango softened the sharpness that the blueberries and blackberries can often bring to the smoothie.

If you have frozen your fruit before hand like myself it can take a little longer to reach the smooth consistsancy. Once completely blended you can then pour your smoothies through a sieve to remove any seeds from the blackberries .

Enjoy
Rebecca x

Tuesday, June 3, 2014

Matcha green tea and honey smoothie

Although I'm a cake addict by trade I try to stick to a healthy eating regime for myself and my family which I think makes having sweet things every now and then so rewarding.

And when my budget allows I tend to buy organic for a few extra cents I really believe it is worth it. This smoothie i made today is one for the grown ups and the odd brave child (if it was pink they would jump at it ha). 

I'm a big fan of green tea it has so many health benefits and with this organic matcha green tea powder it lets me bake with it also.

For this recipe you will need:
2 teaspoons of organic matcha green tea
2 tablespoon of organic honey
1 cup of Glenisk organic Greek yogart 
1 large banana
4 ice cubes 

Break up your banana and pop it in your blender. Next add in your yogart, ice and honey and blend until smooth. Lastly add in your matcha powder and whizz up until completely smooth.

This smoothie tastes delicious it has the smooth creaminess  of the yogart and banana with the subtle sweetness of the honey, all with the added bonus of the matcha green tea...

Enjoy
Rebecca x

Sunday, June 1, 2014

My second guest GIY blog for Beyond the wild garden

So my second installment for Beyond the wild garden's blog has just been launched so in more than thrilled to share it here with you all. And what a difference a month makes in the world of veggies is amazing. Here is the link below why not have a nosey ;)

Friday, May 30, 2014

My guest blog with Beyond the wild garden

http://beyondthewildgarden.wordpress.com/2014/04/18/num-num-not-only-bakes-she-gardens-an-introduction/

I had an opportunity recently to share my GIY experiences on a super blog called www.Beyondthewildgarden.wordpress.com 
I had planned on writing about my adventures on growing fruit and vegetables for the first time so when this popped up I was thrilled. 

Click on the link above and have a nosey. My second giy article will be launched soon so il keep you all posted 

Enjoy
Rebecca x

Saturday, May 3, 2014

Lottie-Daisy's surprise smoothie

We are always trying to get this infamous 5 a day into our daily lives the trick is to figure out how to do this without it becoming a chore. And for me smoothies are the answers when it comes to  our little girlies.


It's no secret lottie-daisy is a picky eater at the best of times, but she seems fearless so far when it comes to smoothies. 

I buy a mixture of fresh and frozen fruit for the smoothies and I would even freeze fruit for the purpose of a super quick smoothie. She says she doesn't like raspberries so between you and I lottie thinks this is a strawberry smoothie!!!

For lotties favourite smoothie (until the next comes along) you will need:

1 cup of fresh orange juice
1 cup of frozen raspberries
1 cup of Glenisk organic yogurt
1/3 of a pineapple

It's as easy as popping everything into your blender no need for ice cubes as your raspberries are frozen. And for the final safety net for a picky eater I sieved the smoothie as I poured it into the glass but I made sure to push as much through as possible.

Super quick yet super tasty

DIY Glenisk "Ice cream"

Summer has finally arrived and here in the Meredith household we are all excited  as it means more time on the kids beloved pony Victoria Plum, mucky boots from from the veggie garden and the compulsive evening ritual of watering the plants. 

With summer comes endless requests for icecream and when you live 2 doors down from the local icecream man you (as in I) gotta think quick. And I'm proud to say Iv come up with a genius idea....

I popped lolly pop sticks into the girls Glenisk's yogurts and stuck them in the freezer until they set....

Take them out a little in advance so you have time to wiggle them out from thei rplastic containers

without a restless audience demanding icecreams ASAP  :)

Sunday, April 27, 2014

My tasty tasty tasty Mille Feuille


Sometimes in life you just need to pull out all the stops and create a show stopper that will impress even the biggest of critics. Only in the past year have I braved the world of puff pastry and you know what Il be hard pushed to buy the shop bought pastry again after realizing how easy and rediculously tasty homemade puff pastry is.

I was able to make mine while waiting to collect Lottie from school, I had a three hour gap so I got stuck in and while the pastry rested in the fridge I was able to get on with whatever else needed to be done like the horrible job of doing the dishes or tidying the sitting room for the hundredth time that day. Puff pastry is actually perfect to make when you have two tornados for kids , who would have thought ha.

For this tasty treat you will need:

Ingredients:
Puff pastry
450g of Plain flour
350 ml of cold water
Pinch of salt
450g of real Irish butter

Creme patisserie:
30g of flour
2 organic eggs
60g of sugar
300ml of organic milk
1 vanilla pod
 
300ml of whipped Cream

Fruit:
Keelings Irish raspberries

Firstly prepare your puff pastry, you will do this by adding your flour, salt and water to a bowl and mixing well. 

Empty the bowl out onto your table and knead the detempre for a moment. Wrap in cling film and pop in the fridge for 30 minutes.

Once the detempre is chilled enough roll it out into a square shape. Next take your butter and shape it with a rolling pin to a similar shape but smaller and slightly thinner. 

Place it on top of the detempre then fold over the  edges of the dough around it so the butter is enclosed in it like an envelope. 

Flour your surface well and then proceed to roll out the detempre and butter into a long rectangular shape.

Fold the pastry in three making sure the edges are uniform then turn it 90' and roll out again. Seal the edges wrap in cling film and chill for 30 minutes. Repeat this method twice then chill for a further 30 minutes before using

Next preheat your oven to 190". Roll out the pastry as thin as possible and depending whether you want one large mille feuille or small individual ones cut the pastry to your desired size.

 I wanted to make small ones so I cut out small uniform pieces popped them on the dampened baking tray making sure not to distort the shape. 

Then I sprinkled icing sugar over the pastry. Next place another baking tray on top of the pastry to control an even rise to the pastry and put them in the oven for no more than 15 minutes keeping an eye on them all along.

While the pastry is baking you can now make your creme patisserie. 

Start by combining the eggs sugar flour and a small amount of the milk. 

As that's mixing heat the rest of the milk and the vanilla in a pot and bring it to the verge of boiling, take it off the heat and pour it into the egg mixture. 

Rinse your pot out, dry it then return the milk and egg mixture to the pot reduce heat to a gentle simmer and continuously whisk  until the pastry cream has thickened. Pour into a jug and place in the fridge to cool.

Once your pastry is a golden colour and has puffed up nicely place them gently on a wire wrack and let cool completely.

Now it is time to assemble your mille feuille. 

For the first layer I like to pipe blobs of the creme patisserie onto the pastry leaving small gaps for the raspberries to sit in between them. 

Next sit the second layer on top and pipe on small blobs of the whipped cream leaving the same space for more raspberries. 

Finally pop the last layer on dust with icing sugar et voila bonne a petite 


Friday, April 25, 2014

My totally tropical smoothie

A super quick smoothie but one that is different from my previous smoothies is this totally tropical smoothie. It has a gorgeous creamy taste to it so it won't last long

For this recipe you will need:

1 cup of pineapple
1 cup of freshly squeezed orange juice
3/4 cup of Glenisk organic yogurts 

Usually I would put the pineapple in my juicer and then add it to my blender with the rest of my fruit but I decided this time to pop it all in together and then pour it through a sieve. The end result is a smooth creamy smoothie

Enjoy
Rebecca x

Tuesday, April 15, 2014

Aldi's new strong white flour and fast acting yeast

When it comes to spending your hard earned money we all want the same thing, value and quality.

For the past few weeks I have been trying out some baking products from Aldi in my day to day baking and blogging. Top of the list for me was the pantrys strong white flour and fast acting yeast.

This is new to their baking range and I feel will be a big hit for Aldi as it is not possible to buy a shops own brand strong flour. So as a consiquence strong flour can be expensive, which in turn could put people off experimenting with bread making.

I really liked the 1.5 kilo size bag ,for making bread at home this for me is perfect. It will fit in my press with ease as it's not as big as my plain flour or my whole wheat flour as they are 2kilo bags but yet it's still a decent size bag and if weighed wisely you will get 3 loaves from it. 

The flour it self had that silky almost creamy texture that other popular brands have that I and many others have used over the years.

The fast acting yeast was identical to two other brands I had in my press and when asked to spot the aldi brand yeast no one could desipher from the three.

On the side of the flour bag was a recipe idea for strong white flour. It's a perfect starter recipe to get your feet wet in the world of bread making. The big thing with bread making is precision and patience if you can remember that this recipe is a sinch.

For this recipe you will need:
500g of Aldi strong white flour
7g of salt
30g of olive oil
7g of Aldi dried yeast 
310g of warm water 

In a bowl mix the flour salt and yeast together. Add the olive oil and warm water then mix all together with your hand. I decided to use my kitchen aid with the dough hook attached. It says in the recipe to knead by hand on a floured surface for five minutes usually you would allow less time in the mixer but I felt it needed the five, when I tried this recipe by hand while the mixer was hard at it I actually needed to knead it for approximately eight minutes.

Shape your dough into a ball by tucking the dough under itself as you slightly turn it then pop it in a large bowl and cover with a tea towel.

After an hour knock the dough back and shape it into a smooth  oblong shape and place into a lightly oiled 2lb loaf tin. Cover again with a tea towel and let it double in size {approx 1hour}

Slash the top of the loaf with a sharp knife and pop in the oven at 220c for 30 minutes if not golden brown leave for a few extra minutes. I took the loaf out of the tin and popped it back in the oven for a few extra minutes.

I found the flour and yeast to be extremely easy to work with and of high quality. The bread turned out fantastic very flavourfull and disappeared within hours. I look forward to seeing these products on Aldis shelves.

A peanut butter + jelly super smoothie

So here we are another week another super yummy smoothie. And I know I say it every week but I think this could be my favourite one yet.

I'm a big fan of the whole peanut butter and jelly combo I have it on my toast and lately Iv been having it on rice cakes with bananas, it's so god dam good. So like most of my recipes this smoothie came to me this morning when I was having my pb+j rice cake for brekky. Hmmmm Rebecca why not stick this combo in a smoothie {minus the rice cake} and I'm proud to say it is delish

For this recipe you will need:
1cup of Glenisk greek yogurt
1 cup of fresh strawberries
1 cup of raspberries (I used a mix of fresh + frozen)
1 spoon of peanut butter
1 cup of almond milk

Simply add all your ingredients into your smoothie blender and whizz until completely smooth.

Don't be afraid of the peanut butter it adds a gorgeous creamy and slightly salty dimension to a simple fruit smoothie.

Enjoy
Rebecca x

Tuesday, April 8, 2014

Smooth like velvet super smoothie

On my crusade to pack as much goodness into myself and girlies as possible I am finding smoothies really are the answer. And the beauty about smoothies is you can really mix it up between fresh and frozen.

For this recipe you will need:

1 cup of glenisk Greek style yogurt
1 cup if frozen raspberries
1 cup of fresh strawberries
1 banana 
1/2 cup of orange juice{not from concentrate}
1/2 cup of ice

Simply add all your ingredients into your smoothie blender and whizz the life out of them until the mixture has a smooth consistency... Et voile 

Enjoy
Rebecca x

Sunday, April 6, 2014

The kitchen in the castle

To my dismay I arrived at the Kitchen in the Castle an hour late, the joys of Saturday morning roadworks!!! I rushed in all flustered fully aware that a slap on the wrist could be on the cards, but to my relief I was met by an über cool lady kitted out in her culinary finery. I was quickly introduced to  my fellow foodies and we got stuck in. 

The course was called Feast from the sea 2 which for me is a dream culinary course as I just love seafood, ever since I was a wee one on holidays in Galway and I'd be sampling(mandatory) fresh muscles and scallops from my dad's plate. From then on I was hooked.

Our tutor for the day was Hazel Mc Fadden a Ballymaloe trained chef, I could tell early on that this was going to be a bit of craic as she had a wicked sense of humour. For me that's what a cookery course should be all about, a laid back easy listening but highly informative class that's hands on. And that really is the  what they want to instil in everyone that comes to the kitchen in the castle, we are here to support and guide you with new skills and techniques but above all have fun doing it...

As I was late I missed out on the trip to the market to pick out the fresh fish but I was right on time for the prep of the first dish and that was grilled macrel. Hazel showed us  the tricks to taking the heads off the fish with ease the correct way to slash a fish for maximum effect with your marinade.

We were shown how to infuse an oil which then can be used as a marinade in this case we used juniper and lemon a perfect combination with the mackerel.

As the mackerel was marinading my fear of cooking scallops was laid to rest, once prepped properly it literally took a minute on the pan before turning them .Hazel had a super way of showing us how to keep our pans organised, she put the scallops around the pan clockwise which meant they then were turned and cooked all equally...the scallops we paired with a ginger and sesame salad.

Our next dish was Seabream baked in a salt crust this was really exciting to make as I had seen it before on TV with Rick Stein but never thought it could be that do-able. We stuffed the fish with herby goodness like parsley, thyme and bay leaves. Before the Seabream went into the oven we combined egg white and course sea salt together and completely encased the fish In it I don't have to tell you how moist the Seabream was when it was time to tuck in.


During the course of the day Hazel incorporated different types of Irish seaweed into a lot of the dishes like the seaweed baked trout, japenese seaweed salad and my favourite the Dulse champ.

For this side dish we made an amazing mashed potatoes using cream, white wine, lemon and butter I'm just salivating at the thoughts of it ha. The Dulse is an amazing burgundy coloured seaweed that you can buy dry and then rehydrated in warm water. This was then finely chopped and combined in the mash...amazing is not the word.

The trickiest dish of the day was definitely the monkfish once the dark skin was removed it also il had an outer skin that had to be removed i was happy to just observe for that part . Hazel showed us how to Ballantine the monk fish which is a fantastic way to shape the fish that then can be cut into perfect medallions before serving.

Using the bone from the monkfish we made an amazing tarragon sauce to compliment it and no word of a lie we were having equal parts of monkfish and tarragon sauce, crazy good that's all I can say.

Through out the course we were given little gems of wisdom by our chef like know how to work your senses around the kitchen it could be the difference between Bon appetite and sorry your having beans for dinner I burnt the spuds!!!

I left feeling completely satisfied and at the same time all fired up and ready to take on all those fish dishes at home, the icing on the cake for me would have been if I had the hubby to drive me home so I could have had a nap as I was so full from all the seafood.

The kitchen in the castle has a jam packed calendar with something to suit absolutely everybody. so far I have my dads birthday present sorted with the paella + tapas course in May and then a fab day out with my hubby for the BBQ course, ever since our stint in Canada he's mad for the BBQ.


© Num Num Cupcakes. Powered by