Tuesday, December 31, 2013

My jazzed up panettone bread + butter pud...

This dessert is an oldy but definetly a goody my granny "Nanos" made a fab bread+ butter pud. And as a consequence my dad is obsessed with the dish I told him I would make this for him over crimbo + he said "now make sure you add plenty of raisins"..


Iv jazzed up this oldy a touch, check it out.
For this dish you will need...

880mls of creamy warm custard
1 large panettone loaf 
1 cup of cranberries
1 cup of raisins
1/2 cup of sliced almonds
1/3 cup of caster sugar

You can either bake one large bread pudding or do what I did + make two Puds in two 2lb loaf tins!!!

Firstly cut the panettone into long slices + then cut them in half. Next start placing them in your tin {which I lined with loaf tin liners} around the sides to begin with and then in the centre.

Once all the panettone is tucked in snuggly in the tins sprinkle in your raisins, cranberries + almond slivers all over the the panettone { don't be to concerned about sprinkling the raisins etc between the slices as the panettone has raisins in it already...

Now it's time to pour over your warm creamy custard, onced it's all covered don't be afraid to squish it all down to make sure all the panettone soaks up the custard...

Pop the loaf tins in a pre heated oven and bake for 55mins @160" and not a minute more...

This is my last blog for 2013 and also the last dessert iv eaten for 2013... Happy New Years my lovelies...roll on 2014
Wonder what my first blog if the year will be....

Enjoy
Rebecca xx


160 55mins

Sunday, December 29, 2013

Buttermilk chocolate chip waffles

Anyone that has been to America or Canada over the years will have experienced "the diner". With their gigantic laminated menus, and everything on the menu comes with a side of bacon or can whipped cream.

For me it's always a toss up between the all American pancake or the whopper sized waffles {topped with freakily glazed strawberries and cream}. My obsession with waffles started way back when I watched this movie called Don't tell mom the babysitters dead {I love odd movies}.

So iv been on the hunt for a waffle iron for the past year and to my surprise I couldn't find one..and then two months ago lidl had them for sale JACKPOT..

For this recipe you will need:
A waffle iron lol
1 cup of plain flour
1 cup of buttermilk
1 teaspoon of bicarbonate soda 
1 free range egg
1/4 cup of plain choc chips
1 teaspoon of vanilla paste

In your bowl beat your egg and pour in the buttermilk and vanilla paste. Next sift in the four and bicarbonate soda. Once your batter is smooth and frothy.

Slowly ladle in a small amount of the batter into each waffle section and close the iron down. When its ready the light will go off on your iron, I was able to get six waffles from this mixture which is amazing and extremely cost effective!!!

I dusted these bad boys with some icing sugar...DELISH...

Enjoy
Rebecca x

Friday, November 15, 2013

Lottie's favorite cookies

When it comes to your children you automatically wantfi  the best in life for them and that includes nutritionally too. My eldest Lottie-daisy is not big on sweets or crisps (thank god) but she does have a soft spot for cookies, iv mentioned this in past blogs. This is her little treat she loves to go to the press take out the cookie tin then ask for a cookie + now her mini me Lillie-b does the same (il have to find a better hiding place).

Now I have no problem with cookies as a treat everything in moderation but its frightening when you actually look at the back of the pack + see the amount of "ingredients" that go into a little chocolate chip cookie or a custard cream. 

So as my blogging buddy Laura always encourages us all to do I decided to get the girls involved in making their own cookies. And what's a bomb proof cookie that everyone can't resist  a chocolate chip cookies, the chewy gooey jammed full of chocolate chips kind!!!!

For this recipe you will need:

2 1/2 cups of plain flour
1 1/2 teaspoons of baking powder
1 cup of butter
1/2 cup of caster sugar
3/4 cup of light muscavado sugar
1 teaspoon of salt
2 teaspoons of vanilla bean paste
2 eggs
1 1/2 cups of chocolate chips(1/2 dark, 1/2 white)

Firstly cream the butter and sugar together until light in colour next add in the vanilla bean paste and when combined add your eggs one by one.

In a separate bowl sift together your dry ingredients add the chocolate chips then mix into your wet bowl, it's a good idea to add the chocolate chips to the flour as it coats them and prevents them from sinking to the bottom of the mixture. 

Once the mixture is ready lay out some baking parchment onto your baking trays and one by one scoop out the cookie dough with two small spoons and plop them down on the trays. I spaced them 4 down and 3 apart as they ooze out when in the oven.

Now pop your trays in the oven and bake @160" for 10 minutes they need to be soft to the touch when they come out and left ALONE to cool completely other wise they will fall apart, as Lottie found out. 

This recipe will easily make 32-36 cookies and they freeze really well but also keep fantastically in the fridge or even sandwiched around a blob of Ice-cream lol


Enjoy
Rebecca x

Monday, October 21, 2013

Scones glorious scones

 What is it about scones that gets people excited. Is it because they're bordering on a cake but its fully acceptable to have them for breakfast!!!!

Iv always had a soft spot for the little things and often tweet pics of gorgeous scones I come across, Kilashee Hotel been one scone Mecca that iv gushed about in the past. Their scones are so god dam good they are always so so fresh and have that lovely short crumbly taste to them. And just to tip you over the edge they arrive to your table with little pots of butter, jam and freshly whipped cream.

It's those little touches that make me come back time and time again. Unfortunately this is where some establishments fail to focus on, Fresh is always best!!!!

So last week as I made my recipe to do list scones were up there amongst other delectable ideas. Over the next few blogs there are some fantastic flavor combos

Firstly is my sultana + cranberry scone, for this recipe you will need:

230g of plain flour
45g of sugar
2 teaspoons of baking powder
1 egg
3 tablespoons of milk
75g of real butter at room temp
40g of sultanas
40g of dried cranberries

Pre heat your oven @220'
In a bowl add all your dry ingredients and combine well with a whisk {this makes sure there are no lumps and everything is thoroughly mixed}. 

Next add in your butter and crumble together with your fingers and thumbs like you would if you were making short crust pastry. 

Once the butter has intermingled{HA} with the dry ingredients pour in your whisked egg + milk then with your hand fold it altogether then sprinkle in your dried fruit folding them in also.

Flour your surface a empty your scone mixture out sprinkle lightly with flour then gently and briefly roll out {the less you handle the mixture the nicer the outcome} try to keep the scone mixture quite thick. Cut out your scones and place on a baking tray lined with baking paper, lastly paint on a beaten egg + sprinkle with sugar.

These only need to be baked for 15 minutes, the smell will be glorious so be strong and try not to eat them all the minute you take them out, I popped a few in the freezer to have on such a gloomy day as today!!!

Enjoy
Rebecca xx

Friday, October 18, 2013

Wicklow farmhouse cheese

A few weeks ago I got imvited to a cheese making day in one of Ireland's successful cheese makers the Wicklow farmhouse cheese. I automatically accepted as a prior foodie day out had gone so successfully and really got me fired up 

Then reality kicks in Rebecca aren't you slightly afraid of cheese, stinky mouldy ones to be precise. I felt maybe this wasn't the right day out for me but then I thought no this is ideal for you, go and educate yourself on cheese get out of your comfort zone and do it. I think I even described it to one of the bloggers as my version of I'm a celebrity get me out of here{slightly dramatic don't you think}

So on the bus we got and headed off to Clodagh McKennas new restaurant in Blackrock where we all got to catch up with familiar faces and got aquatinted with new colleagues. And what a treat it was stepping in to Chlodaghs restaurant was refreshing it was bright and airy but with a very welcoming feel. There was so many little private areas where you could escape to with friends or family and sit for hours indulging on her seasonally well thought out dishes.

I chose the crab cakes for my main which were jam packed with crab meat which was refreshing as it  is common for a fish cake of any kind to be bulked up with potato. This was accompanied by an amazing chili spiked guacamole, for me chili and seafood is a match made in heaven. All in all that dish was divine.

After a relaxed chatty lunch we bid fair well to Chlodagh and  headed on our way to Arklow where the family farm was. 

After some time we pulled into the dairy farm which has been run by John and his family for decades. John took over the farm from his dad in '73 when his dad became ill it was then and there he decided to reclaim the surrounding land which in time had to be developed and drained. John realized quickly that this was going to be a full time job.

They decided to focus on one thing and do it well, milk was the answer but unfortunately financially it was paying bad and certain companies were solely in control of 1/3 of the milk in Ireland.

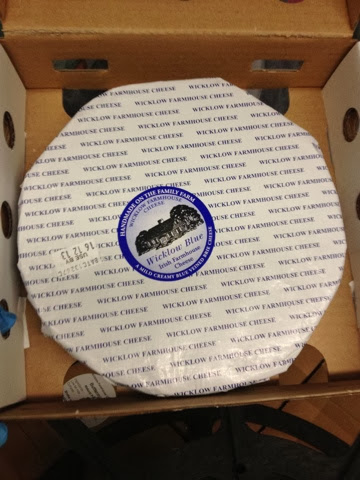
Not afraid to look outside the box John decided to approach the Enterprise board where they mentored and work with him. He went on to do a start your own business course with them which helped him realize their was a niche in the market for farm cheese. Wicklow did not have anything like this so it was perfect and there the Wicklow blue was born.

They Initially started with farmers markets where they basically made the cheese to order, there they learned from the customers what people wanted from a cheese.

But the only way to grow the business was to go to the supermarkets. Which worked out for the better, this company has grown organically and has gone from strength to strength. They have 9 employees in the factory and the farm.

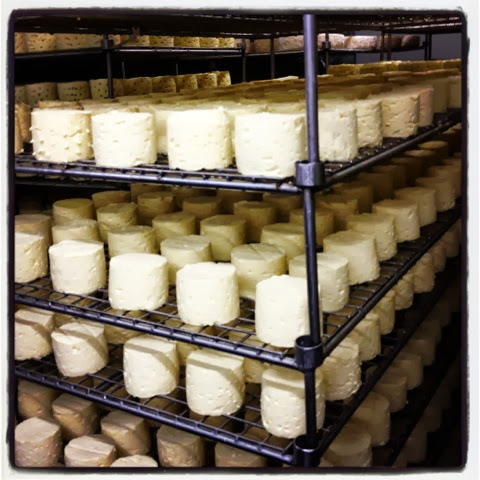
Mary Johns daughter took charge of making the cheese and over looks the quality for the past two years and John was pleased to tell us that thanks to Mary they received their BRCA grade last week which is a huge accomplishment for a small cheese company. Samples of the cheese are taken away every 5 to 6 weeks but in Johns factory they do positive release everytime, which means no cheese is released without the all clear.

From now until the end of November they are making cheese for Christmas. You can find their amazing cheeses inTesco, Dunnes , Aldi and Petits Supervalue.

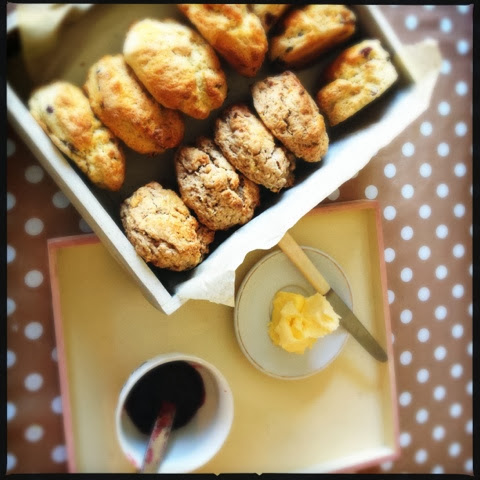
We were lucky enough to be able to sample some cheeses at the end of the day and after listening and seeing what goes into the cheeses I can tell you as a novice I felt confident to sample the different flavors they had. 

My fave was a tie between the seaweed infused cheddar{ the seaweed comes from Mayo} 
and the tomato and basil mature cheddar. Amazing flavors that melt in your mouth, and a wee tip for you a good cheddar should always melt in your mouth. 

So the next time your out shopping restrain yourself from picking up the easy singles and go for a home grown creation like the Wicklow farmhouse cheeses.

Monday, October 7, 2013

My Pumkin pie

It's official when it comes to festivities I'm your only man for as long as I can remember  I just love the celebrations at the end of seasons...like HALLOWEEN.

When we moved to Canada earlier this year the thing that excited me was the thought of Fall all the gorgeous leaves in those multitude of jewelled shades. Then there's the pumpkin picking where you actually go and pick your own in Pumpkin farms not just from a giant box in Lidl {that still excites me by the way}

I had visions of my new front porch filled with all kinds of pumpkins in there crazy shapes and sizes. Anyway we are back home in good old Ireland + thanks to my obsession iv also found a pumpkin picking farm we can go to not far from ours so happy days.

So here we are in October so it's obvious this cake girl is gonna bake a pumpkin pie, for this recipe you will need:

9 inch short crust pie blind baked {in my blog}
1 can of Libby pumpkin purée
1/2 cup light muscavado sugar
1/2 cup caster sugar
1/4 teaspoon of salt
1/4 teaspoon of nutmeg
1/4 teaspoon of ginger
1 teaspoon of cinnamon
1/2 tablespoon of flour
2 organic eggs
1 teaspoon of vanilla bean paste
1 cup of condensed milk

In a large bowl add your pumpkin purée, sugars, salt , flour + spices then mix together. Next beat in your two eggs + vanilla paste. Then lastly mix in the thick condensed milk, at this point the smells are making you salivate but hang on in there my lovelies in less than an hours you'll be tucking in :).

By now your pie crust will baked so pull out the shelf in the oven + simply pour in the pumpkin filling making sure not to flood it.

Bake for 15 minutes @200' then turn down to 170' for 30 minutes, this will be gorgeous with vanilla infused whipped cream or even some yummy ice cream

Enjoy
Rebecca

Friday, October 4, 2013

L'officina @ Kildare village


This week after dropping Lottie-daisy off to Montessori I decided that I was in need of some self Indulgence. But not just anything would hit the spot, my mé féin moment had to be chocolate + of the highest quality.

So seeing as Kildare village is only minutes from our home it would be down right rude to pass it by...

Right in the corner of the "village" by the fountain homes Dunne + Crescenzi's gorgeous Italian eatery L'officina which in Italian means workshop just incase you needed to brush up on your Italian.

With their high wood clad ceilings + large chalk board menus it is quite easy to be transported to a different time + place where quality + flavor is paramount.

Iv eaten here on many occasions with family or even for a quick coffee fix with my friends + I can honestly say iv been pleased with my dish every time. So this time round it was still early in the day + with two wee children I needed a coffee fix but when I studied the morning menu there was no way I could pass up a "dense" Italian hot chocolate + even though it was €4 for a hot chocolate I said feck it go wild.

And I'm so happy I lived life on the edge that morning because what came out was what I can only describe as chocolate soup it was glorious completely over the top but that's what I needed at that point in time. I don't know why I'm evening telling you this but I might have even been spotted dipping pieces of my pain au chocolat in it...don't judge I've been eating carrot sticks ever since to try balance out this devilish delight HA


Saturday, September 21, 2013

Lavender honey rice pudding

As long as I can remember my family have been a clan who love their rice pudding, we didn't even need an excuse to make it there was always a big dish of the creamy stuff out on the table with the dark skin shielding it from busy fingers.

I myself much prefer making rice pudding in a pot than in the oven you get longer out of the dessert not that it will be allowed hang around long enough to check its freshness.

During the summer I ransacked my dads lavender garden + took bags of fresh lavender home to dry out for future recipes, there's something about lavender that puts a smile on my face my front door is surrounded by the purple stuff, nothing nicer when you walk out that door +  this is the first breath of fresh air you take in mmmmm.

So for this recipe you will need:
500ml of milk( whole or low fat your choice)
125g of short grain rice
2 tablespoons of sugar
1 1/2 tablespoon of lavender honey
Toasted flaked almonds

Firstly pour your milk in a pot and bring to the boil. Add your rice + sugar in and reduce the heat + turn your timer on for 25 minutes. Don't go far from your hob as you will need to stir this oozy goodness every now + again.

Once you are coming up to the time have a wee taste + if the bite from the rice has gone take it off the heat. While the pudding is still hot drizzle in the fragrant honey + then stir, taste again + add more honey if the flavour is to subtle.

When serving I like to add an extra drizzle of the lavender honey + then sprinkle with the toasted flaked almonds, these give a fantastic texture to the creamy pudding. I just hope you can control yourself when it comes to sharing lol

Enjoy
Rebecca

Monday, September 16, 2013

Chocolate, cream cheese + blackberry brownies

I love when a recipe slaps you in the face right out of the blue. I gave myself yesterday to concentrate and enjoy the task of recipe writing, the hubby pottered off to our local insomnia coffee shop with his Mac book to send off a few cvs + brought Lottie-daisy with him. I put lillie-b down for her snooze and away I went on my baking tangent.

Like anyone who is juggling a thousand things in their daily life when a notion hits I have to write it down quickly as it flithers off just as smart, in the full knowledge that a window will arise that I get to give it welly in the kitchen.

It could be one ingredient that sparks a whole idea or it would have to take a few jotted down notions to compile to one eureka moment. It just so happened it snowballed with me yesterday, half way through one recipe test another popped in so that got made + then written down. And sure here we all are  for this ridiculously good baked goody you will need...


100g butter
200g 70% chocolate
250g caster sugar
4 eggs
70g gluten free flour( or normal)
50g cocoa

Cream cheese layer
175g cream cheese room temp
3 tablespoons of butter room temp
50g sugar
1 egg
3 table spoons of Flour

1 cup of fresh blackberries

Firstly make your brownie batter. Over a double boiler melt the chocolate + butter, while that's melting beat the eggs until light in colour + then add the sugar. Whisk this until all the sugar is dissolved.

By now the chocolate and butter should be completely melted so take it off the boiling water + leave to the side. In another bowl sift together the dry ingredients then add to the eggs. Once fully folded in pour in your melted ingredients.

Now in another bowl add your cream cheese + butter and cream together thoroughly until smooth. Add the egg + sugar in next + mix well. Lastly add your flour.

So lets put this altogether, firstly line your shallow brownie pan with baking paper this makes it so easy to take out the brownies. Pour in the brownie batter first next pour over your cream cheese batter evenly over the chocolate you can even spread it slightly with a spatula. Lastly evenly place your fresh blackberries on top of all this gooey goodness, pop it all in the preheated @180' for 30 minutes + I mean 30 minutes don't even check it when the timer goes take it out any longer + the whole thing loses its gooey ness...

Once out of the oven let it sit for a few minutes before cutting into slices you should easily get 18 squares out of this recipe.

Now this can be devoured on its own or you can up the anty by pairing it with some of my country creme fresh{ you will find this in my blog}

Enjoy
Rebecca xx


Tuesday, September 3, 2013

Instant Salty chocolate prezels

Sometimes there's nothing nicer than a "ready in moments" treat with all the flavour + none of the effort. Well the other night was one of those moments that I needed a quick fix of indulgence but couldn't think of anything I had in the press that would do the trick.

When we lived in Canada for the summer the shop shelves were jammed with every sugary sweet going but one thing that always caught my eye was chocolate dipped prezels but me being me never bought them as you could only buy jumbo bags of them + You know yourself once you open the ptack sure it would be rude not to finish it HA...

So back to my munchie dilemma I had a craving but didn't think I had anything to hit the spot until I copped I had a "normal" size bag of little prezels + a big bar of dark chocolate stashed up in my baking press, you gotta love the 74% coco solids for baking....

So for this uber quick quick + rewarding snack you will need

175g bag of prezels
100g 74% dark chocolate
1 teaspoon of butter
Baking parchment

Firstly in a double boiler melt your chocolate. Once melted add the butter making sure it's fully combined.

Take the chocolate off the heat + one by one dip half the prezel into the choclate, then shake the prezel gently to remove any excess chocolate. Place it onto the baking parchment. 

 Once all the prezels have had a dip and are chilling out on the paper leave them for a while to set, don't be tempted to pop them in the fridge this will coz the chocolate to lose its shine.

I stored these bad boys in a large jar so there was no chance of them going stale , that would just be cruel now wouldn't it.

The combination of the salty prezel with the bite of the dark chocolate is a match made in heaven, I will be tucking in these with a vino tonight to watch the Great British bake off...it's the sime things people....

Enjoy
Rebecca xx

Sunday, August 25, 2013

Tried + tested Glenisk's pop up shop

Back in the day I was in Dublin city 5-6 days a week doing my Leaving Cert and then on to a few years of college. But these days it's with a lump in my throat that i say that it's once in a blue moon that I get to saunter through St Strephens Green or ogle after the macarons in Brown Thomas.

So when I was up in town a few weeks ago for a foodie day out I knew there was a few foodie spots I had to check out while I had the opportunity. One place that has been buzzing on twitter in recent weeks is Glenisks pop up shop on Dawson street.

When I first walked into the pop up shop I was so impressed with the whole look it was so airy with big windows kitted out with fabulous old milk jugs that I would love for my own collection. Their organic products were displayed all on one wall it reminded me of Willy Wonka but for yogurt lovers HA.

Hats off to the girls working there they were incredibly inviting they couldn't have been more helpful, they went through every dish on their menu board I really couldn't decide.

One of the dishes that did excite me on the menu was their Irish smoked salmon for me that was a no brainer. 

This pot is so ridiculously More'ish il be ordering seconds next time. Firstly you have these chunky pieces of Irish smoked salmon along with  a small handful of capers, a sprinkling of freshly chopped dill, freshly crack black pepper and a drizzle of lemon infused olive oil YUM.

Now that combo alone is a match made in heaven but Glenisk go one further and rest this winning combo on top of a generous dollop of their organic Greek style yogurt. It's super light and velvety and doesn't have that overwhelmingly tangy aftertaste some Greek style yogurts can have ...

So put this altogether and you end up with a rocking little pot perfect for that impromptu picnic in St Stephens green or even better yet leg it in there for a lunch pot and don't forget they do dessert pots too..

Glenisks organic yogurts for Children are a winner with my wee girlies too and now that Lottie-daisy will be starting pre school next week the portion in the pots are perfect for her morning snack along with her fruit...


Well worth a walk up Dawson's street 

Enjoy
Rebecca xx


Friday, August 23, 2013

A celebratory summer pie

This summer has been so unbelievable my garden has never looked so good Lottie-daisy has had some serious fun on Victoria plum( that's the ponys name don't ask) and we have hit the beach proper Irish style, flasks of tea ham sandwiches and ice creams on the way home.

But something that I have really loved this summer is going for long walks with the hubby and our wee ones along the country lanes around our house foraging for blackberries. It reminded me of when I was a young'un and my Nanos + Jackie(the grand parents) would come down from dublin and stay with us in the sticks for weeks on end. One of the things we used to do with Nanos was go for long walks, well they seemed long for our little legs...and on the long long walks apart from getting stung by nettles and having to spit on dock leaves to get rid of the sting was pick what felt like a million blackberries to make tarts for my dad and Jackie to devour.

So this summer has definitely added a bunch of happy memories to my little family's lives. And in celebration of this summer iv come up with this celebratory pie, for this recipe you will need:
THIS RECIPE MAKES 2 PIES!!!
Pie base:
175g plain flour
25g icing sugar
100g of cold butter
1 table spoon of cold water
1 egg yolk

Pie Filling:
6 sweet apples
200g Irish strawberries
200g of fresh Irish blackberries
1 cup of sugar

Vanilla batter:
3/4 cup of butter 
3/4 sugar
3 eggs
1/2 cup of glenisk whole milk
1 1/2 cups of odlums flour
1 teaspoon of baking powder
1 teaspoon of vanilla

Serve with glenisk creme fresh 


 Firstly begin to make the pastry crust. I like to combine it by hand but if you have a food processor be my guest.  In a bowl pop your flour, icing sugar and diced cold butter. next rub the contents through your fingers and thumbs basically until all the butter has reduced into teeny tiny pea like crumbs. Next I pour in the tablespoon of water and one egg yolk and combine . Once its come together plonk it out on your board and knead it briefly so as it rolls out perfectly but not to much that makes it tough as old boots!!!


Next roll it out nice and thin making sure its large enough to fit in your flan tin. A little trick I saw on the telly box one time was if you get a scrap of left over pasty roll it into a ball it works as the perfect tool to press your pastry into the sides of your crinkly tin.

Pop tinfoil over the pastry leaving the pastry uncut over the sides, then pour some baking beans over that. Pop in your pre heated oven at 190' for 10 minutes. After that trim edges and pop back in uncovered for a following 8-10 mins. Once thats done take out and let cool.

Next for the filling peel and slice the apples into even pieces, chop the strawberries in half but leave the blackberries as they are. Evenly pop them all round the pastry base then sprinkle over your sugar.

Now for the vanilla batter cream the sugar and butter together then add the eggs one by one and mix for for a few minutes. Next add the vanilla and butter milk before adding the flour and baking powder. 

Once your batter is made dollop the mixture speradically around the pie filling when baked this sponge mixture will have oozed in and around the apples and berries..

Pop the pie in the oven @ 180' for 35minutes. When baked the berries will be bubbling in delight the vanilla sponge will be golden in colour, oh and your kitchen will smell divine  that's a sure sign your pie has baked to perfection...

A generous dollop of avenmore whipped cream is a match made n heaven. This pie is amazing hot...


Enjoy

Rebecca xx


Rainbow peppers + potato tart


So whilst we are in full swing of national potato day I have a fantastic but equally as simple potato tart for you all to whip up. When we went on our potato pilgrimage last week to the Ballyknocken school of cooking Catherine showed us how easy it was to put together a potato tart. For hers she used caramelised onions and thyme with salad potatoes, well it was divine so I thought to myself have a look in your fridge girl + see  what happens.

For this recipe you will need:
1 roll of puff pastry
1 cup of homemade tomato sauce(see previous blogs)
1/2 red pepper
1/2 Yellow pepper
1 teaspoon of chopped thyme
1/2 cup of ricotta cheese
4 medium queen potatoes already cooked
Olive oil 
Salt and pepper to season
Rocket to garnish

Pre heat your oven to 200'c. Unroll your puff pastry no need to roll it thinner it will be thin enough.

 Cut your pastry into 4 pieces then ladle on the tomato sauce leaving the edges clean. Next slice your potatoes thinly and place them onto the pastry evenly, follow this with your thinly sliced peppers. Then with a spoon dollop the ricotta in and around the potatoes. Lastly drizzle with olive oil and season with salt and pepper. 

Pop the four mini tarts in the pre heated oven for 25mins. The pastry should be golden in colour and puffed up nicely on the sides. I liked to garnish the tarts with some fresh peppery rocket, absolutely gorgeous and so so simple.

Sunday, August 18, 2013

Tried + tested mr Hollywoods cob

In the world of baking there is one craft that gives me huge satisfaction + that is bread making. The process from beginning to end demands such precision that one lazy move on your part + it all goes belly up.

The chemistry alone is fascinating such as the relationship between the yeast + salt, it's like an old fashioned disco boys on one side girls on the other with the dance floor in between. HA funny but its true with Paul Hollywoods recipes for bread he explicitly says in your bowl add the yeast on one side and the salt on the other as the salt will effect the yeast and make it lazy I suppose.

So for this cob recipe I literally read it and read it again followed it to the letter, when mr Hollywood tells you to knead the dough for 5-10 minutes by god you knead that dough for 5-10 minutes I think I kneaded it for a good 10 minutes with the fear of failing.

Long story short this is a super beginners bread and once followed properly is a smashing bread to make over and over.

For this recipe you will need:
500g strong flour
10g salt
10g instant yeast
30g butter softened
320ml cool water 

Firstly in a bowl I popped in the flour + then sprinkled the salt in one side + the yeast on the other. Pour most of the water in on the flour + add the soft butter, next combine them all together as your mixing add the remaining water drop by drop.
Keep combining until the inside of your bowl becomes clean.

Lightly flour your work surface and plonk out your dough + begin to knead the bread, I preferred the folding technique where you fold it back on its self and then turn its to the side and fold again. Repeat this for ten minutes you'll certainly feel this in you arm and wrist but hang in there it will be so worth it

Once 10 minutes is up you will end up with is silky springy dough mr Hollywood would be proud of. For the cob you need to transform this into a sphere do this by tucking the dough under itself whist constantly swiveling it.

Pop your dough in a bowl which you have slicked with oil and then cover with a tea towel for 2 hours or until your dough has doubled in size. After 2 hours plonk out the risen dough on your lightly floured work surface + knock it back down briefly, shape it again into a sphere but this time pop onto the baking tray + then pop into a clean plastic bag. Leave for an hour to prove. Take the tray out of the bag dust the cob lightly with flour and lastly slash the cob with a knife...

Pop in the oven for 30minutes @230'. What I did for the last 3-4 minutes was turn the bread around to even the colour out on the bread. Once your timer goes off take out your loaf + give it a tap tap under neath, you should get a distinct hollow sound if so bobs your uncle you are now the proud owner of a mr Hollywoods cob 

Enjoy
Rebecca xx

Tuesday, August 13, 2013

The Irish blog awards 2013


So I'm sitting on the couch around this time last night with the hubby watching obviously something boring on the Telly box as there I am scrolling down through twitter.

I notice a tweet saying the long list nominations for best food/drink awards are out, so I immediately open it to have a good nosey at the lucky ones.

I am scrolling down through all the familiar names that I'd see on a daily basis all thanks to the world of twitter and the community that has evolved from the Irish food bloggers page, god bless it that's all I have to say I'd be lost without it. 

Anyways I'm getting side tracked there I am scrolling down looking at all these names thinking you lucky bunch of "duckers"....then all of sudden I'm disgusted there's a blog on the list that is the exact same blog name as mine. 
The cheek of it I'm gobsmacked so I click into it to see what it's like + surprise surprise it's MINE I can't believe it,  not for a second did it dawn on me that it was my blog I remember looking at them all last year and been in awe of the whole idea of been picked...

I'm so thrilled my blogs been acknowledged talk about motivation lets get bigger + better

Thanks for everything
Rebecca xx

Sunday, August 4, 2013

My orange cake with fresh Raspberries

Well if you liked my last blog about my orange + poppy seed cake you are going to love this other version of that cake. It is still the amazing mouth watering orange cake but with juicy fresh raspberries instead of the dinky wee poppy seeds

For this recipe you will need:
2 cups of butter
2 cups of sugar
4 eggs
1/2 cup of orange zest
Juice of 1 1/2 oranges
3 cups of plain flour
1/2 teaspoon baking powder
1/2 teaspoon baking soda
1/2 teaspoon
3/4 cup of buttermilk 
125 g of raspberries


Firstly cream your butter + sugar until pale in colour, next add in your 4 eggs one at a time what I actually like to do is beat the eggs together in a separate bowl + add that to the mixture I find its less likely for the eggs to split.

Once their all combined add the juice + zest of your oranges well. In a separate bowl sift together all your dry ingredients + by hand fold it in to your wet mixture along with the buttermilk .

Grease and flour your two loaf tins and pour in your cake mixture mankins sure their even. Lastly pop in your raspberries evenly throughout the cake mixture pushing them down slightly.

Pop in the oven for 45mins @ 160'

Once out I also drizzled these cakes with an orange simple syrup. Then when cooked I drizzled over an oozy orange drizzled which I included crushed fresh raspberries so the drizzle would take on the crazy pink colour...

An absolutely gorgeous cake to serve for any occasion

Enjoy
Rwbecca


My orange + poppy seed cake

Big things were happening this weekend in my house, the hubby was coming home from Canada for good + all I can say is there is two little girlies who were bursting with excitement. It was as mad as Christmas Eve last night. We were like the Walton's in my bed I was hanging out the side while the mini num nums were like star fish HA...

it's a given that we'll be having visitors + that also we'll be calling round to family + friends, so any excuse for mento come up with a cake recipe for the blog. And I know iv mentioned the love affair my grand dad had with all things sweet before but a real favorite for him when he and my Nanos would come stay with us down in the sticks was an orange cake I can still smell the fragrant cake that filled the kitchen. 

So I'm using this occasion to finally give an orange cake with a twist of course a go..

For this recipe you will need:
2 cups of butter
2 cups of sugar
4 eggs
1/2 cup of orange zest
Zest of 1 1/2 oranges
3/4 cup of buttermilk 
3 cups of plain flour
1/2 teaspoon of baking powder
1/2 teaspoon of baking soda 
1/2 teaspoon of salt
1/4 cup of poppy seeds
This recipe will make two 2lb loaf cakes

Firstly cream your butter + sugar until pale in colour, next add in your 4 eggs one at a time what I actually like to do is beat the eggs together in a separate bowl + add that to the mixture I find its less likely for the eggs to split.

Once their all combined add the juice + zest of your oranges well. In a separate bowl sift together all your dry ingredients + by hand fold it in to your wet mixture along with the buttermilk .

Lastly sprinkle in the gorgeous blue, grey + black dots that are your poppy seeds into your batter and evenly combine.
Pour your cake batter into two loaf tins which you must grease and flour before hand so the yummy cakes don't stick.

Bake for 45 minutes @ 160'
Once out of the oven I trickled a simple syrup over the cakes
made from 1/2 cup of orange juice with 1/2 cup of sugar. The when the cakes were completely cooled I drizzled the cakes with an orange glaze made from 2 cups of icing sugar + just enough orange juice that it makes an oozy consistency...

Enjoy
Rebecca x


Friday, August 2, 2013

Caramelized pears with cinnamon swirls

Sometimes in life all you need is a ridiculously decadent dessert but without all that prep and major stress...well look no further below is the recipe for my swirly cinnamon cups filled with caramelised pears and toasted almonds...

For this recipe you will need:
1 roll of puff pastry
6 pears
100g of dark chocolate
2 tablespoons of cinnamon
2 tablespoons of brown sugar
2 tablespoons of ground almonds
1/2 cup of toasted almond flakes
Butter
Extra brown sugar 

So lets gets started firstly unroll your pastry out flat then evenly sprinkle your cinnamon, sugar + ground almond onto your pastry.

Next roll up your pastry like it was in the beginning + cut into 8 pieces. At this point you will see the cinnamony swirls beaming back at you they look divine. 

With your rolling pin or with a glass tumbler which ever comes to hand  gently flatten each swirly section like a saucer. Once their all flattened sit each of them in to a cupcake tray + pop into your preheated oven @ 160' for 20minutes or until lightly golden.

While your cinnamon swirly cups are baking away peel + roughly dice your pears then pop them in a pot with with the smallest nob of butter. Once your pears have began to bubble + soften sprinkle in 1/2 a table spoon of light brown sugar this will help caramelise the pears. Gently test the pears with a cake tester to see if they are fully cooked the last thing you want is your pears to resemble baby mush, that would be a major fail!!!

Ok so your cinnamon swirly cups are baked and out of the oven cooling on a baking tray, your pears are ready for take off. So the last things to prepare before you assemble this magical dessert are to toast the almonds on the pan + melt your plain chocolate over a double boiler.

On your dinky serving dish place out your swirly cinnamon cups, spoon in a small amount of the pears into each cup. Next drizzle over the melted chocolate + lastly sprinkle on the toasted almonds YUM!!!

This dish will get you major brownie points for really very little stress at all

Enjoy
Rebecca x

Sunday, June 23, 2013

Banana bread pancakes


So your all pretty familiar with my love of pancakes by now I just think they are by far the most exciting thing to eat for breakfast( its the little things in life that do it for me). But surprisingly enough I would be very conscience of what I eat, like many of you I have a resident devil + angel living on either shoulder willing me or taunting me to eat all the food choices that come my way.

So it dawned on me if I can have my wee ones eat only brown bread why not slip a little of the whole wheat into their pancakes....soooo I did but oh I didn't stop there, bananas are a fab "accessory" to add to pancakes so I said feck it il add them in too. I then took a gander in the pantry + found honey and coconut flakes, happy days iv the making for banana bread but il stick it in their pancakes...

For this recipe you will need:
1/2 cup whole wheat flour
1/2 cup of plain flour
1 teaspoon of baking powder
1 large egg
1 cup of butter milk
1 chopped banana 
1 table spoon of coconut flakes
1 to 2 tablespoon of honey

So to start by adding both flours, baking powder, eggs and buttermilk to your bowl and mix really well untiil you get a smooth frothy texture.

Next dollop small portions of your pancake batter onto your pre heated pan that you've splashed with a teeny bit of oil. I usually dollop four pancakes at a time unless of course you are looking to make a bigger pancake.

Once your pancakes are on gingerly place your sliced banana pieces onto the pancakes, before you turn the pancakes sprinkle a small amount of your coconut flakes over each of them then turn. 

Next add a small teaspoon of the honey to the base of each pancake. keep a close eye on the pan, there is a fine line between toasted coconut + burnt honey with cremated coconut the latter ain't so good... 

And that's all she wrote these little babies are so good with the tangy taste from the buttermilk + the wholesomeness of the flour all combined with the totally tropical extras your onto a winner 


Enjoy
Rebecca xx 


Tuesday, June 11, 2013

Tuesday, May 28, 2013

Toasting marshmallows with a twist

I have such funny happy memories as child camping in my best friend Kate's kitchen in a makeshift tent made out of umbrellas, chairs + bed sheets...

Part of the camping experience would involve toasting marshmallows held by forks over a tea light. saying that we'd basically try to toast anything we got our hands on, already toasted bread along with the cooked sausages that came with them HA....

So to pass on my heart warming nostalgia to my wee ones we decided after our BBQ this evening we would toast some gigantic marshmallows over the flames + delight Lottie-daisy with the gooey rainbow sprinkled blob on a skewer...

For this messy adventure you will need:
Gigantic marshmallows{1 per person}
BBQ skewers
Rainbow sprinkles

This is a super quick process with big rewards. Firstly place your marshmallows on their skewers, next hold them over the flames + watch them scorch in a matter of moments. Keep turning the skewer every few seconds so it's sizzly all over.

What I like to do next once I'm finished toasting them is to literally pull off the scorched skin to unveil the gooey marshmallow underneath + straight away dunk it in my bowl of rainbow sprinkles...FAB

This will be a winner with adults + children after your BBQ, sit back + enjoy..

Enjoy 
Rebecca xx


Something funny for you..Worlds biggest BBQ's


http://www.calorgas.ie/biggest-bbqs-on-earth
-infographic/

Wednesday, May 22, 2013

The hubby's shortbread cookies


As long as I can remember when christmas came around in our house so did the tins of shortbread cookies sprinkled with sugar in all different shapes, they were my dads all time favourites + now it turns out its the hubby's all time fave cookie all year round not just christmas, at christmas the dosage just goes up in shocking quantities!!!!

So christmas gone I decided I was going to make food hampers for everyone instead of buying something for the sake of buying it.... One of the hamper fillers was these shortbread cookies + they were a complete success . So now that we are in Canada + the Hubby is working all hours I said it would be the perfect treat for him when he came home this evening...

For this recipe you will need:

180g of real butter
70g of icing sugar
2 teaspoons of baking powder
180g of flour
70g of corn flour

Firstly pop the oven on @ 160'
Make sure your butter is really soft so it is easy to cream with your icing sugar. Next add the flour, corn flour + baking powder together, then slowly mix all the ingredients together. The consistency will be quite crumbly but thats good that is the nature of the cookie.

Once it has almost come together dust your countertop with flour and topple out your dough + knead for a moment or two. Next wrap the dough in cling film + pop in your fridge for 1/2 hour.

So  1/2 hour is up unwrap the dough + pull off approximately 23 little dough balls + place on your baking trays. Lastly get a fork + squash down onto the dough. Pop these in the oven for no more than 12 mins. they will come out light in colour but I guarantee they will be fully cooked....

Be prepared to eat 1/3 of the cookies once they come out of the oven as they are to irresistible!!!!


Thursday, May 16, 2013

Porridge 3 ways

This is just a quick blog about breakfast time in my house we seem to be like the three little bears. We all have porridge but everyone has it in their own differnt way. Lillie-B been the youngest just has her porridge simply with a splash milk. Next there is Lottie-D the unofficial picky eater she has her porridge with strawberry yogurt swirled in. Then lastly there is me + I love my porridge with a blog of local honey YUM.....

Just goes to show porridge can be had at any age + for any taste

ENJOY XX


Super easy brown soda bread

Brown soda bread is just one of those things that is a must on any irish families kitchen table. It only has a hand full of ingredients all of which are good for you, low in fat + full of yumminess.

In a past blog I have shared a brown soda bread with you all but this new one is even easier for you to make + most importantly is fool proof, perfect for any novice out there.It takes no time at all to prepare + you'll be eating this bad boy with in the hour.

For this recipe you will need:
2 cups of white flour
2 cups of 100% wholewheat flour
1 cup of jumbo oats
1 teaspoon salt
1 teaspoon of baking soda
1 pint of buttermilk

Firstly pre heat your oven @200'

Start by adding all the dry ingredients in a bowl and combine together well. Next pour in most of your buttermilk + mix well, once its almost combined pour in the last of buttermilk. Don't forget to scrape the bottom of the bowl you'll always have a few scragglers left behind.

Next on your counter top sprinkle some wholemeal flour out, then flour your hands + plonk out the bread mixture. Here you are going to spend a few minutes kneading the brown bread, adding wholemeal flour to the countertop + hands as needed. There is no doubt that you will need to scrape some dough off your hands and the countertop so don't let this fluster you. In the end you want the finish product to be even + oval in shape.

Dust your baking tray with wholewheat flour place the dough on it, then with a knife cut a cross on the top of the dough this allows the bread to expand. Sprinkle some those jumbo oats over the top before you pop it in the oven for 40 mins.

3/4 way through the baking time i like to turn the brown bread around so as to give an even browning. Once your timer beeps open the over turn the bread upside down + give the underneath a wee tap it should sound hollow... bobs your uncle your brown bread is baked...

this brown bread is perfect for freezing thats if you have the discipline not to eat it all

ENJOY XX


© Num Num Cupcakes. Powered by