Wednesday, November 28, 2012

My gluten free rock salt and olive oil bread

So there i was knee deep in cupcakes last Friday and a selection of them were gluten free, and just incase I wasn't going to be under pressure with making 50 cupcakes for a baby shower I had this notion that id give making gluten free bread a go, had never made it before but I had seemed to be on this gluten free buzz for the past few weeks as I had made gluten free meat loaf the week before for my other blog "2 girls with a blog".

So as I'm whisking my cupcake batter( and must mention my beloved machine stops twirling, so I've to hand twirl my bowl on the machine as the whisks go 90)and all the while in my head I'm conjuring up flavor friends, and I look up for a moment and there in front of me is a bottle of extra virgin olive oil....boom goes my brain why not use olive oil and rock salt that's a guaranteed marriage of flavours.

For this recipe you will need:
390ml skimmed milk
420g gluten free flour
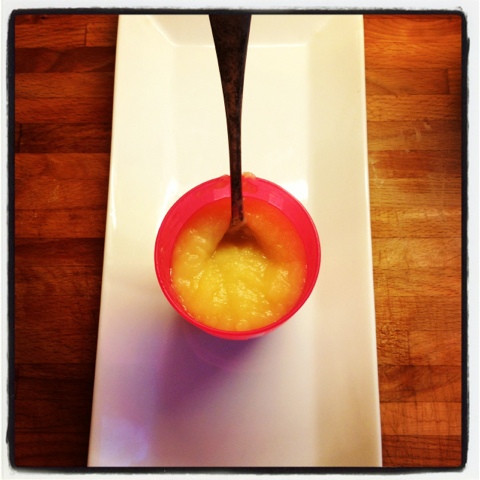
150 ml extra virgin olive oil
1teaspoon of rock salt

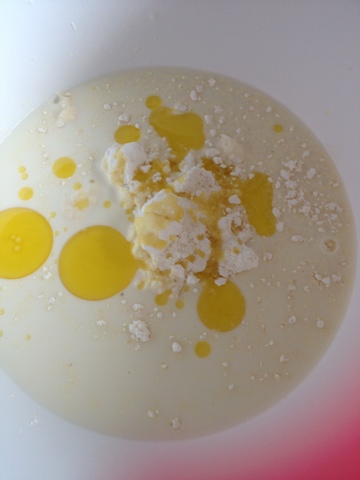
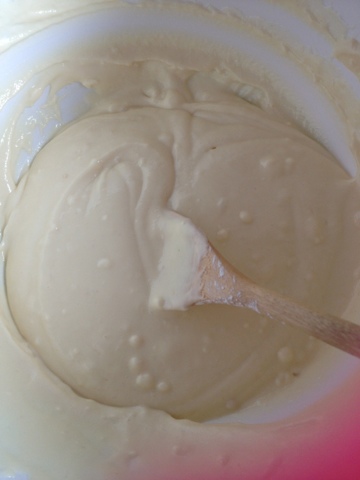
Firstly in a bowl add your flour and whisk gently to remove all the lumpy bumps, next pour in your skimmed milk and 90 Mls of your oil and combine well this will take a few moments to combine evenly.

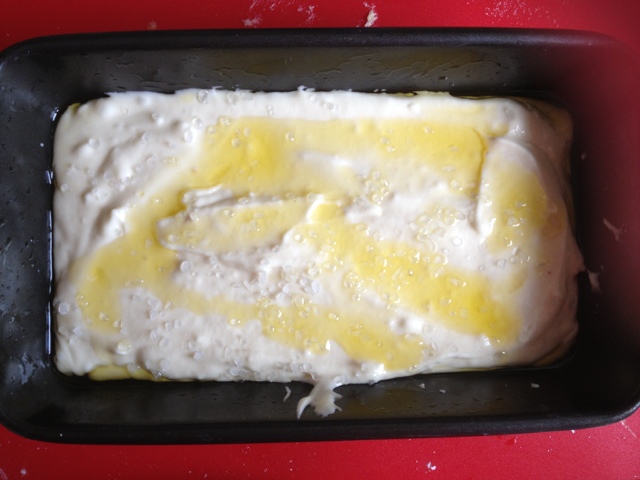
Coat your 2 lb loaf tin liberally with some of the left over olive oil not to use it all as the remainder is for drizzling over the top.

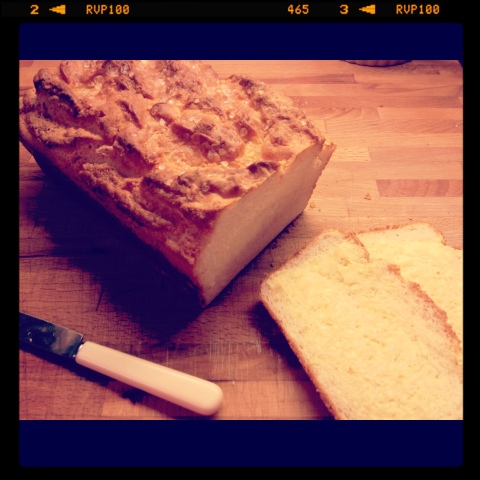
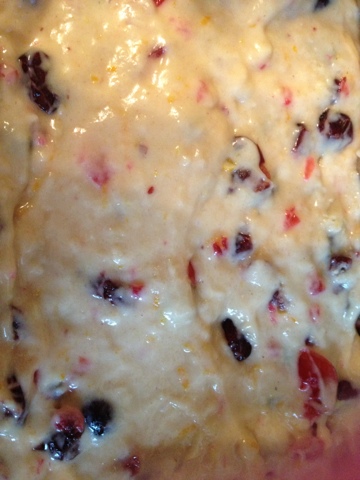
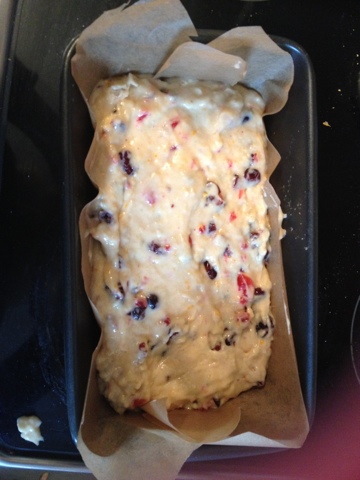
Pour in your bread mixture note that this mixture is an extremely wet consistency but the outcome will be a very light airy loaf.

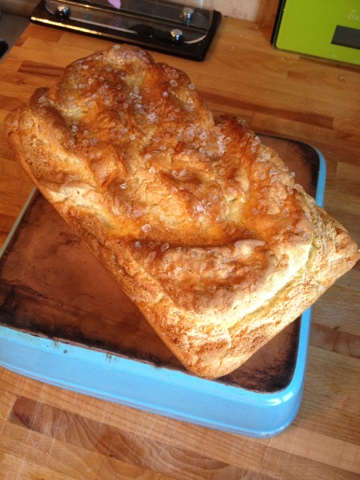
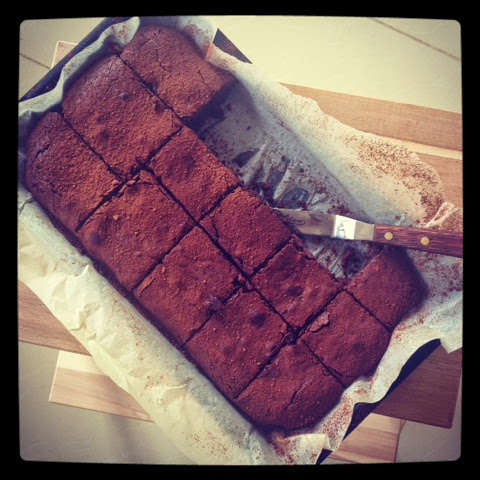
Drizzle the last of the olive oil over the batter before sprinkling with your rock salt. Pop it in the oven @160' for 45 minutes. It will rise super quick and a fab golden color will appear sooner than you think don't panic it's all part of the process.

For me this bread was YUM the crunchy rock salt on top and the unique tang of the olive oil was just so more'ish, so more'ish infant that I nearly ate the whole bloody thing haha...

Enjoy
Rebecca


Friday, November 2, 2012

My apple & black berry crumble

So while I'm down the path of luscious desserts my grandad Jackie used to adore this next one is a given.

He used to love equal measures of apple tart to cream and I'd say when my gran "Nanos" made the apple tart for him she'd be lucky to get at least One slice from it.

So with all things sweet iv put a little twist to his apple tart and invited along some crowd pleasers . For this recipe you will need:

Crust:
175g flour
25g icing sugar
100g diced cold butter
1 egg yolk
1 tablespoon of water

Filling:
7 small apples peeled and sliced thinly
1 punnet of blackberries
Zest of 1 orange

Crumble
100g of light brown muscavado sugar
100g of butter
200g of flour

So lets get started get your pastry dough made wrapped in cling film and then pop in the fridge this will keep the butter cold which will prevent it from shrinking away from the sides of the flan tin.

Blind bake @190' for 10 mins remove the foil and bake for a further 8 mins. With apples and blackberries comes lots of moisture so this will prevent a soggy bottom!!!

In a uniform pattern place the apple slices on the pastry. once all the slices are down pop the gorgeous blackberries evenly over the apples .

Next get started on your crumble. In a bowl pour in your flour and sugar and combine. Then add your cubed butter and rub them all together until you get a crumb like consistency.

Sprinkle this liberally over your apples and blackberries and pop it in the oven @ 180' for at least 30 minutes, by the time your crumble has goldened your fruit has softened nicely and the glorious purple tones from the blackberries have mingled with your apple slices...

I kept true to jackies tradition and teamed this crumble with whipped cream more of a 70/30 ratio than his 50/50...(",)

Enjoy
Rebecca

A cranberry & cherry orange loaf

My grandad Jackie had the sweetest tooth known to man, he had porridge for breakfast which without fail was coated liberally with sugar.

One of my favourite foody memories of Jackie was seeing him sitting at his kitchen table with an unusually big dessert spoon eating trifle straight out of the trifle dish, there obviously was no time to put it in a bowl lol...

So when ever they used to come and stay with us down in the sticks my mam would have a few weeks worth of desserts made in anticipation of this love affair with all things sweet.

One dish that sticks out in my head is an orange loaf, just the smell of fresh oranges triggers that food memory for me.
So here is a twist on that very orange loaf..for this you will need;

2 cups plain flour
1/2 teaspoon of salt
1 teaspoon of baking powder
2 tablespoons of oil
1 cup orange juice
Zest of 1 orange
1 egg
1/4 cup of caster sugar
100g of glacé cherries
160g of dried cranberries

In a bowl pop in the chopped cherries and cranberries, the zest and juice of the orange. Give this a good mix then sprinkle in the sugar. Set aside for minimum 1/2 hour this will give the cranberries a chance to get nice and plump from the juice.

In a separate bowl sift in all your dry ingredients, once that's done pour in your oil and a whisked egg and combine.

Next mix the two bowls together with a wooden spoon, this is a wet mixture which in turn will give you a fab moist loaf.

You will pour your mixture into a pre lined 2lb loaf tin and pop into your oven which will be pre heated @180' for 30 minutes.

For this loaf you want to check and check again with your skewer that it has baked fully as there are a lot of wet elements to it.

Pop on the kettle and cut your self a few slices and enjoy Sooooo good.

Rebecca


Thursday, October 25, 2012

Lillie-B's first fruit purée

I can't believe it's this time already, Lillie-B is becoming accustomed to the world of FOOD. So far it's going without a hitch last week we tried sweet carrot purée, this week we moved on to a scrummy sweet potato & parsnip purée and you'd swear she'd been gobbling food forever...

Sometimes still feels like Lottie-Daisy should be still gobbling down all this. So today iv decided to go wild and make her my yummy apple purée.
For this you will need:

5 small children's apples
3 table spoons of water

Firstly I peeled the 5 small apples and chopped them up, the reason I used these cute teeny apples is the flavour, they have such a soft sweet flavour. Which is spot on for babies and children of all ages.

Next pop your chopped apples in a pot and add your 3 tablespoons of water. Cook this on a low heat for 8 minutes exactly .

The tip of your knife will pierce through your apple chunks with ease at this stage. I used a hand held blender to purée the apples and I blended them in the pot(saves on the washing up)...

I divided the purée up into little pots and froze them they will keep perfectly for a few weeks..

For Lillie-B I added a few baby spoons of the purée to her baby rice and it was a hit, a great way to introduce the flavour to a baby...

Sunday, October 21, 2012

My super decadent brownies

What is it about brownies, it's like they have some super magnetic force that draws you to them. And when there baked well by god do they hit the spot...

Now iv had my fair share of brownie disasters iv curdled the mixture and even over baked them so when I finally perfected my brownie recipe I had to share it with you guys...for this recipe you will need:

100g butter
100g plain chocolate
100g milk chocolate
250g of caster sugar
4 large free range eggs
70g plain flour
50g cocoa powder

First of all fill a pot 1/4 the way full with boiling water and sit a heat proof bowl over it making sure it is not actually touching the water.

Dice your butter and break up all your chocolate and pop them in the bowl stirring occasionally, while your chocolate and butter is melting away, crack your four eggs in another bowl and whisk until pale and frothy. Next add your caster sugar to your frothy eggs and whisk like mad until well combined.

Once your chocolate mixture has melted take it off the heat and allow it to stand. Sift your flour and cocoa into your egg mixture and gently fold it in, you put the effort in to making your eggs and sugar all fab and frothy don't ruin it by lashing it together.

Once you have mixed that its time to pour your melted chocolate into your batter and once again fold it in.

Now for this recipe iv used an 8" round silicone cake mould, iv greased the base and sides before pouring in the mixture. Pop it in your over @ 180' forgot 30mins the time will vary if you are using a different tin and if the mixture is more shallow.

After 25mins check your brownie we want to centre to be gooey but not raw. Once baked leave to cool before removing and cutting

I like to dust mine with cocoa and icing sugar before dividing it up into bite size squares...YUM

ENJOY
Rebecca


Monday, October 8, 2012

Martha Stewart's New York cheese cake


So here's another tried and tested recipe from the cooking genius herself Martha Stewart. I think when it comes to her recipes if you follow them exactly your in for a winner.

So I decided I would try something more technical this time, now I know when you hear cheesecake your probably thinking that's not very technical but this cheese cake is super big in size and instead of popping it in the fridge you bake it. So here we go you are going to start off with the yummy biscuit base. What you will need:

12 digestive biscuits
2tbl sugar
6tbl butter melted
Pinch of salt

Firstly crush up the biscuits nice and fine in a bowl sprinkle in the sugar and salt before pouring in the butter. With your wooden spoon combine it all really well.

Next get your 11" spring form deep cake pan which you have lined with grease proof paper and pat the biscuit mixture evenly on the bottom.

Pop in the fridge for 10 mins to set, then pop it in the oven @ 160' for 15 mins

While that is setting/ baking lets get on with the creamy cheesecake mixture. For this you will need:

56oz of cream cheese(room temp)
1/2 cup flour
2 1/4 cup sugar
1 cup sour cream
1 1/2 tsp vanilla
5eggs

Firstly make sure your cream cheese is at room temp, you get a much smoother consistency when it's not cold

In your mixing bowl pop in all the cream cheese and give it a good stir, next add your sieved flour, sugar and sour cream to the mixture and combine well

In a separate glass/bowl whisk your eggs and vanilla together i do this so the flavours are evenly combined and distributed through out your cakes. Add to mixture and stir.

I like to have the cake tin out and cooled slightly before I pour in the mixture. Also what I like to do is spray the sides of the pan with a baking spray so with any cakes the mixture won't stick to the side.

Next place out two large sheet of tin foil on your counter and sit the tin in the middle, bring the foil up the sides and higher than the top. Now what you are meant to do next is sit your tin in a large roasting tray and surround with hot water but little old me didn't have a whopper roasting tin that would fit an 11" pan, so been a mini mc guyver that I am I popped the roasting tray with hot water at the bottom of the oven so steam would still dance around the oven!!!

Bake for 45 mins @ 160' then reduce to 150' for a further 30 mins. Turn off your oven when this is all done and let cool in there for an hour...

This cheesecake was out of this world I served it at my wee ones christening and I was raging because it was gone in a flash not one slice left for me with my tea the next day ha ha good complaint I suppose.

Wednesday, October 3, 2012

Raspberry and lemon frangipani tart

What is it about a slice of tart that washes all your cares away...this weekend was my wee ones christening and I baked up a storm for it.

One of the tarts I made was this raspberry tart I had been researching this recipe for a while on the google box and for a lot of the recipes I looked at the quantities just didn't add up, so I ditched them and decided to do what I should have done from the start and go old school on it...work it out myself.

For this recipe you will need:

Pastry crust:
175g flour
25g icing sugar
100g cold butter
1 egg yolk
1 tbl water

Like in my previous blogs combine your pastry crust by hand, roll it out nice and thin, carefully pop it in your flan tin. Blind bake @190' for 10mins remove the foil and bake for a further 8mins.

While that's in the oven get cracking on your frangipani batter, for this you will need:
250g butter/stork
250g sugar
4 eggs
200g ground almonds
Zest 1 lemon
2 punnets of raspberries

Firstly melt your butter, then add the sugar and beaten eggs and combine until pale in colour. Next add the zest of 1 lemon and then your ground almonds, mix well.

Gently dollop out your frangipani mixture onto your pastry crust and spread out evenly making sure it doesn't go over the edges.

Now the fun part ,decorate your tart with your raspberries however you choose I went for the nerdy look and did circles and more circles. Don't press them down as they will sink in themselves.

Pop your tart in the oven @180' for 35-45mins

This is such a moist yummy cake and is perfect for breakfast lunch and dinner lol...

Monday, October 1, 2012

My all American pancakes

For me if I had to choose breakfast over lunch there would be no contest I just love breakfast if you make an occasion out of it that is....so for me there is nothing nicer than a fluffy stack of American pancakes with crispy bacon and maple syrup YUM.

For this super quick & yummy recipe you will need;
1 cup plain flour
1 cup milk
1 egg
1 teaspoon baking powder

Whisk the egg, add the milk and then combine with your dry ingredients and whisk enthusiastically for a moment or two until your mixture is bubbly.

In your frying pan pour a small splash of oil. use a mild oil like sunflower or vegetable so the flavor does not overpower the pancakes yummyness.

With a ladle pour out a small amount of the mixture at a time so each pancake turns out the same size. If their to big they can taste quite doughy so if you keep them small they are browned on the outside but super fluffy on the inside.

Go wild and jazz up your pancakes by incorporating slices of bananas in the batter or even chocolate chips...

Sunday, September 23, 2012

My super zingy three lemon tart

For any occasion be it in your own house or as a guest in someone else's there is nothing better than has a stylishly simple tart to have for your sweet moment. So I thought id share this fantastic recipe my Lemon tart. Iv found when flicking through recipe books that a lot of lemon tarts call for nine to ten lemons which in fairness sounds like a lot for a tart that you just want to whip up in a jiffy.
So for this tart you will need:
175g flour
25g icing sugar
100g cold butter
1 egg yolk
1 tbl water

This is your short crust pastry, I like to combine it by hand but if you have a food processor be my guest.  In a bowl pop your flour, icing tugar and diced cold butter. next rub the contents through your fingers and thumbs basically until all the butter has reduced into teeny tiny pea like crumbs. Next I pour in the tablespoon of water and one egg yolk and combine with one hand(so you you have one left to answer that phone that always rings when your mucked up to the elbows!!) once its come together plonk it out on your board and knead it briefly so as it rolls out perfectly but not to much that makes it tough as old boots!!!
Next I roll it out nice and evenly thin making sure its large enough to fit in your flan tin which is 23cm wide. Now you might think iv lost it altogether but iv actually used a silicone flan tin for this, so when the pastry is rolled out I put an upside down silcone tin over it I then gently and I mean gently fold the pastry up onto the tin and whip it right side up because I can find if I roll the pastry onto the rolling pin to put in your tin its an accident waiting to happen lol. A little trick I saw on the telly box one time was if you get a scrap of left over pasty roll it into a ball it works as the perfect tool to press your pastry into the sides of your crinkly tin.
Pop tinfoil over the pastry leaving the pastry uncut over the sides, then pour some baking beans over that. Pop in your pre heated oven at 190' for 10 minutes. After that trim edges and pop back in uncovered for a following 8-10 mins. Once thats done take out and let cool.
Whilst your base is baking in the oven get stuck in to your filling, for this you will need:


zest of 3 large lemons
130mls juice
4 eggs
220g caster sugar
125ml cream

so in a bowl whisk your eggs and sugar together, next add the zest and juice of your lemons until its light and well combined. Once your happy with your mixture pour in the cream and mix again. When your crust has cooled pop it back on your oven tray( oven temp reduced to 150') and SLOWLY pour in your lemony goodness. And whatever you do slowly push the tray back in and gingerly close the door. Set your timer for 30minutes you will be looking for a set filling with a wobbly middle ha ha never thught so dont be afraid to check it just before the time. if its baked to long cracks will appear and it will taste of lemon rubber!!!!


what i like to do as a cheeky finale is sprinkle some sieved icing sugar over the top and gently bronze with a wee blow torch and voila we are done....ENJOY(",)

Friday, September 7, 2012

Out of this world brown soda bread


When you think brown soda bread you think of mini you sitting at your Grannys kitchen table, and on  your plate homemade soda bread with thick cut slices of ham on top...YUM...basically brown soda bread equals nostalgia.
There are certain shops you will drive to just to get your brown bread fix like Avoca  or Superquinn your guaranteed perfection every time.So i thought to my self its about time I make my own brown soda bread that I can pass on down to my kids and so on. I tried a few recipes over the past year from friends and recipy books but I just couldn't seem to master them, they would come out stogy and half raw which for a semi perfectionist drove me bonkers. Even my best friends Mam has a fantastic recipy  she got from her Mam that we used to eat when we were younger whenever Grandma used to come and stay in hers and it was DIVINE, but when I went to make it id fall flat on my face lol...
So here we are after a year of tinkering and tedious testing I have finally perfected my brown soda bread , and maybe its the Lemsip talking and making me feel awfully generous but iv decided to share my recipy.....ENJOY

230g Hearts Delight
210g Plain Flour
1 tsp Salt
1 tsp Bicarb Soda
50g Sesame Seeds, extra for the top
50g Poppy Seeds
2 Medium Free range eggs
410ml Buttermilk

In a large bowl add the Hearts Delight, Plain flour, salt and bicarb and mix with your hand then sprinkle in the seeds and give the mixture another swirl. In another bowl/measuring cup break in the two eggs and whisk lightly then pour in the buttermilk and mix. Combine your wet ingredients now with your dry and combine with a wooden spoon. This mixture will be quite wet but that is the consistency we are looking for.
Next line your 2lb loaf tin with grease proof paper and slowly pour it in. Pop it in your pre heated oven and bake for 40mins @ 200'c
When it comes out of the oven take it out of the tin and peel off the grease proof paper and give it a wee pat under neath and it will have a hollow sound, thats exactly what your looking for that means its baked through if you didn't have that sound you are guaranteed that when you put in your skewer it would come out sticky!!!!
i love the way the seeds give this bread a fantastic texture not only on the top of each slice but the whole way through it has a super crunch to it without been overwhelming ha ha...ENJOY

Sunday, September 2, 2012

wedding cake no.2

The next wedding cake I'm going to dissect for you is one of my fave cakes. The concept for the cake was so far fetched I had to jump at the chance to do it as I knew an opportunity like that doesn't come along every day.
Visually we wanted this cake to look like a giant bouquet of roses all in gorgeous pastel colors. So first things first I had to work out how many hand made roses it would take to cover the three tier cakes, an eight, ten and twelve inch cake, long story short I decided it would take close to three hundred roses to cover this bad boy. To make the rose I used sugar paste and a lot of it, I think it would actually hurt my head to work out how many kilos i used in the end. The roses were quite time consuming as each petal was made from scratch and each rose needed at least seven petals. Like a real rose it should be assembled in layers, the bud in the middle three petals hugging the bud and finally three more petals hugging the first layer of petals. Each petal then has to be gently folded back to give the delicate look of the rose, now picture that times 300 lol.
Once the cakes and roses were complete it was the daunting task of assembling it all together. I found these cool cake wires especially for sugar paste flowers, once I had them all cut to size I then inserted them into the base of the roses using whisked egg whites as a natural adhesive.
Now you know that moment before you try something out for the first  time and god only knows if its even going to bloody work or not well picture me sitting at my kitchen table with a sea of roses sitting in front of me, talk about anxiety but BOOM it all came together without a hitch...and BREATH.
So the fun part was now upon us putting all the roses in their new homes , making sure the colors were even steven and all snuggly fit beside each other.


The best part of it all was hearing the screams of excitment from Emma the bride through her text after i sent her the final pic, and then even better was the moment I closed the door after the cakes were collected and were driven off ha ha....

Its a dirty job but someones gotta do it


So part of my blogging adventures into the world of baked treats are busy not only am i sharing about my yummy creations but I'm also taking on the tedious task(ha ha) of trying out treats that are on the market ready prepared for us to combine and whack in the oven...
The first "almost ready" treat i delved into was the JUST' ROL(bake it fresh) DOUGH....in the form of Pain au chocolat. Instantly when i clapped eyes on this wee red box i got giddy, to me pain au chocolat are yummy pillows of buttery goodness that you usually see in the baked section of M&S or in Starbucks but they are not something that i or many of us would just whip up on a whim.
The istructions read quite well. Firstly open the cardboard can fully and unroll the pastry, once you have that done you then have to divide up the flattened dough into six pieces which is super easy as the pieces are practically separated for you. Next you take two pieces of the dark chocolate sticks and pop them on either end of the dough and roll each end over the chocolate sticks, when you have all six pastries assembled you then place them on your baking tray upside down. Whack them in your pre heated oven set your timer for the required time, pop your coffee machine on and sit back and chill out.


I was so chuffed with the end result they were exactly like the real mc Coy and the taste well all i can say is ate two of them with the greatest of ease that i felt it only right to give the rest away because if i didn't i would have eaten them all in one breath (",)

Tuesday, August 21, 2012

Cakes glorious cakes

Wedding season is well under way for me, I definitely think cupcake wedding cakes as a genre is getting stronger in the world of weddings . Once the happy couple have taken the leap and chosen cupcakes the next decision is whether or not to have a cutting cake on top or purely have cupcakes. Over the next few blogs I will be showcasing some of this years wedding cakes and the ideas behind them.
This first cake I'm going to talk about is this super cute cake, the flavours that were chosen are always a great crowd pleaser as there is something really for everybody. The winning flavours were double chocolate, zingy lemon and vanilla bean.
For me I like the theme of the day to be captured in the cake completely, for instance the flowers that were used in the reception were ivory in color and lucky for us the florist had kept a few small flowers aside for us so I was able to incorporate them in the display. I used gold metallic cases for all the cakes which gave a great platform for the colors of the frosting and really showed off the pipping styles.
The cutting cake was a 7" chocolate layer cake with a chocolate buttercream filling, the outer design was a vintage rose design in an ivory color, we decided to keep it a neutral color so not to take from the colors of the cupcakes.
All in all it was understated, beautiful and sofisticated with a cheeky twist thrown in for good measure with the ball and chain bride and groom sitting on top....

Wednesday, March 14, 2012

Martha's blueberry muffins

When you think of Martha Stewart you automatically think she's the queen bee of cooking and baking, so when I came across this recipe for "Martha's blueberries muffins" I flew down to the shop and bought up every blueberry they had(two meesily punnets)


I made the crumb topping first so as to have it on hand to sprinkle on my muffins before I pop them in the oven...you will need the following...
3 tablespoons of butter
1/2 cup of flour
1/4 cup of brown sugar
1/4 teaspoon salt
1/2 teaspoon of cinnamon
(I reduced the measurements of the orignal crumb topping as I found it made way to much)
Mix the flour, sugar, salt and cinnamon together in a bowl and in another bowl melt the butter briefly so it's softened but not gone completely runny. Pour your butter into the dry mixture and combine to make a crumbly texture, pop it to the side.
Next comes the muffin mix you will need the following...
1tablespoon of fresh baking powder
1 teaspoon salt
3 cups and 2 tablespoons of plain flour
6 tablespoons of butter/stork
1 1/4 cups of sugar
1 egg and 2 egg yolks
1 teaspoon of good quality vanilla
1 cup of milk
2 cups of washed blueberries


So I combined all the dry ingredients together by putting it through a sieve, in the mixer I creamed the butter/stork and sugar together until it was light in colour. Next I added the egg to combine it before adding the two egg yolks once I was happy with the texture I poured in the vanilla. So the next part of all batters I like to do in stages as I find it keeps the mixture quite light, pop half the dry mixture in the bowl and mix slowly before adding 1/2 the cup of milk then I repeat with the dry mixture and the wet. Turn off your machine and give it a good scrape around the edge to ensure flour is all combined, once your a happy camper pop the blueberries in and gently fold them in to the batter so as not to burst them all.
Pop them in their muffin cases 3/4 of the way full then sprinkle the crumble on top...
Have your oven preheated to 170'c and your timer on 30 minutes, stick em in and enjoy warm (beware of bursting hot blueberries lol)

Thursday, February 16, 2012

De-lish pastry

On my mission to find all things yummy in the world of baking iv come across some real hit and misses time wasters if you will, there's nothing worse than putting the time and effort into a newly discovered recipe a hopeful gem for it to turn out like a lump of crap. So when I found this "fool proof" recipe for the perfect pastry I just had to try it out.....I found it in one of my Jamie Oliver's books and I have to say its fantastic, and I find it's so versatile it can be used for sweet or savory il elaborate in a wee bit.
Now I love baking using American style measurements it's not as daunting for people to try when I pass them on, so get yourself a decent set of measuring cups and spoons so your recipe will work every time.
Start off with one cup and two table spoons of chilled real Irish butter and pop it in your bowl or mixer and cream together with one cup and six table spoons of caster sugar and don't forget to add a pinch of salt. Next briefly combine three and a quarter cups of flour to your creamed mixture. Now in a mixing jug add one tablespoon of good vanilla extract, four egg yolks and three tablespoons of milk. Whisk together and add to your dry mixture, combine it all together until it forms a ball I find you don't want to over do it as you will be rewarded later in the taste. Wrap your pastry in cling film and pop it in the fridge.
After its been resting for a good twenty minutes flour your board and your pin and gently roll it out. This mixture will line two large pans with plenty left over to make a snuggely blanket for the top of them to make the perfect pies.
If its an apple or fruit pie/tart your desiring I always recommend you part bake it for at least ten minutes so you don't end up with a soggy bottom.
I like to mix things up when making savory dishes by adding the zest of an orange and or a lemon to the pastry mixture especially if it's for a fruit tart of crumble it really compliments every element of your dish.
So be brave take a deep breath and try it out you won't be disappointed (",)


© Num Num Cupcakes. Powered by